Embroidery Hoops

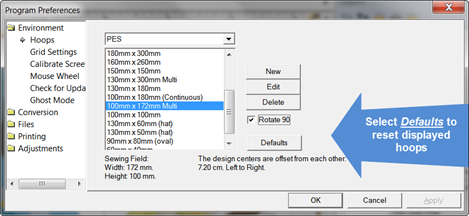
In the Preference window, under Environment, you can choose a hoop. Hoops are displayed in a sorted list, organized by embroidery file format. Most embroidery hoops are made using the metric system, so the sizes for the hoops are displayed according to the way the manufacturer sells the hoop.
There are many hoops that are built into the program, and you can add your own. As the program updates over time, or if you have edited a hoop, you can use the “Defaults” button to restore the program to the hoops provided. The “Default” button will not, however, remove any hoops you’ve added yourself.
Some manufacturer multi-position hoops are listed – they have “Multi” listed after the size. Designs will automatically split upon the Save and a text file will be created with the stitching instructions. See the section on “Notes on Multi-position hoops” for more information.
Many times you will want to sew a design sideways in the hoop. But rather than laying out your design sideways, it might be convenient to have the hoop displayed as rotated. Checking the “Rotate 90” button accomplishes this.
If you have added a hoop, or if you decide to have the program display only the hoops that you own, you can delete hoops from the list, using the “Delete” button.
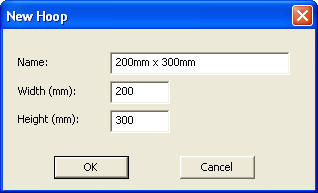
You can create hoops and edit hoops too.

The width and height fields are self-explanatory, and you can name your hoop as desired. Hoop names should be unique.
Note: Do not create a hoop that is bigger than the sewing field of your embroidery machine.