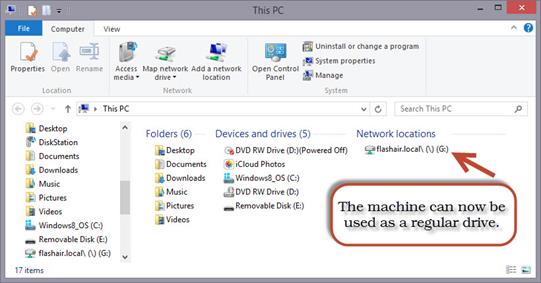
The configuration that the program does on the card is advanced and rather handy. It also sets up the card as a Mapped Network Drive on your computer. This way, the ‘machine’ will now appear as a drive in your Windows system:
Note the particular drive ‘letter’ may be different from system to system. The mapping of a network drive is normal Windows technology. You can right-click on the drive and choose ‘disconnect’ if you wish to. If it gets lost or you want to map it on another computer, you can do so by clicking the ‘Map Network Drive’ button in Windows File Explorer (seen above) and type http://flashair.local as the network path. You can also use the expedient of running the setup process again starting at step 1 on another computer with the Platform installed.
NOTE: You can also run the configuration of the FlashAir via the Platform’s menu:
‘Utility->FlashAir->Configure’ as long as you have the FlashAir card in the USB-SD carrier and the carrier is in the USB port of the computer.
When you save in any Windows program, it usually uses the Windows Save As panel. In the Platform, this is called up by clicking the menu ‘File->Save Stitch file As’.
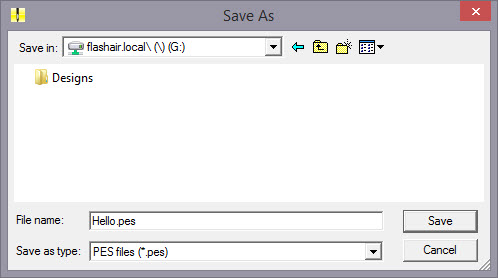
Here you make certain to choose the file type you need, in our case it is .pes. Next you select your mapped drive. It should look similar to the above dialog, although your system may display it slightly differently.
Double-click on ‘Designs’ to save into that folder and click ‘Save’.
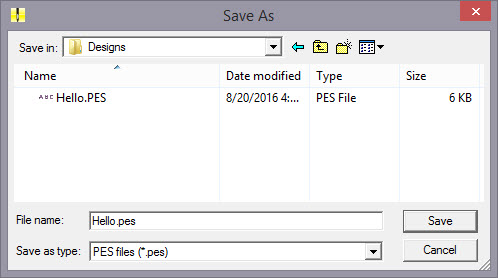
Here we see our first test design (which we called Hello.pes) and any other designs you have on the card.