Sides Left/Right Method
 This
method of creating satin columns creates the shape and the incline lines at the
same time. Selecting this mode also forces you into the Point mode for entry,
because the only way to create alternating points on the sides of the satin is
by clicking.
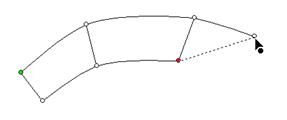
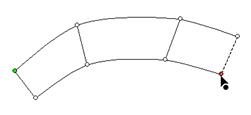
What you’ll do is create the outline by clicking a point on
the ‘left’ side of the satin column, then a point on the ‘right’ side. You keep
going, left, right, left, right until you have completed the shape. It will look
like you have drawn a ladder.


As you make each pair of left and right points, you are not
only defining the shape of the column, but also adding incline lines across each
pair of points at the same time.
As with Point Input mode, you can create curves by
left-clicking, lines by ctrl-left-clicking and cusps by shift-left-clicking.
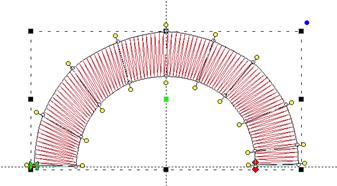
When your shape is complete, right-click to end the input and
generate the object. The shape can now be edited if necessary. Note the inclines
here can be manipulated as if you drew them individually. There is no difference
in this style of input from any other, other than how it is drawn. One benefit though is that the inclines at the ends will
line up to make a straight edge which goes all the way across the shape.
When entering a curve, as you click along try to imagine the
curve as going around a center – as you click, each pair of points should point
toward that center.

 This
method of creating satin columns creates the shape and the incline lines at the
same time. Selecting this mode also forces you into the Point mode for entry,
because the only way to create alternating points on the sides of the satin is
by clicking.