Satin objects are like any other – they have a shape. It is the inclination lines that define that shape as a satin. This has some noteworthy effect on the ‘ends’ of the shape, because, naturally, shapes don’t have ends; people perceive them though.
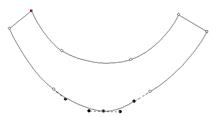
In the picture below, what do you see?
Perhaps a rudimentary smile? And what are the ‘ends’? If we asked a thousand people, they’d all tell you the same thing. The ends are the flat sections, right? Therefore the natural idea is to have inclinations that parallel those lines.
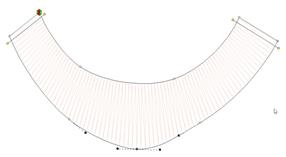
In fact, this is how inclines work, with respect to the shape. Once the last incline is ‘seen’ the program keeps the angle the same, regardless of the shape:

Sometimes you will see stitches ‘diving’ into corners. This is because the shape, past the incline, looks pointed. In this image, the incline on the left is parallel to the points ending the shape, but the incline on the right is not:
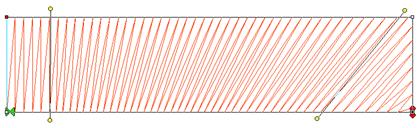
The program will look for two corners, and find them if they make a line that is reasonably parallel with the ending incline. If they’re not found, then the stitches just keep going at their current angle, whatever that may be.
Note: You can adjust incline points by dragging them. If you hold the shift key down while dragging an incline endpoint, the other side of the incline line will move with it.