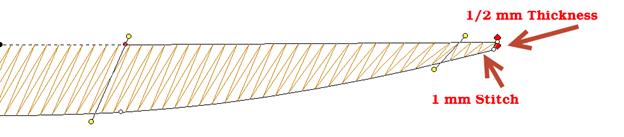
Satin stitching is hard on fabric; it pulls the fabric, it pushes the fabric, the needle comes down so close as to cut it sometimes. Narrow satin stitches are the worst, as the fabric is pulled tightly under the tension of the thread, and the needle comes down in a very dense pattern. Depending on the fabric you are embroidering, a narrow column of stitches (perhaps as wide as 1mm) can be too much stress for the fabric and can cause puckering or gathering. A more generous 1.5mm of travel is preferred. This mean that any ‘points’ in your shape will want to be clipped a bit so that the stitch has a bit of travel. If you are wondering what 1mm looks like, it is slightly wider than the needle you are embroidering with. If you think about it, a needle width isn’t a lot, but giving the extra length of stitch can do quite a bit for the sew-ability of your design.
Sometimes your column will narrow down toward a point, and there is some relief that can be given here with inclinations. If you angle the stitching slightly as it comes into the point, the stitches stay a bit longer, while the column continues to narrow. This effect is known as chiseling, and it is effective.
Also, narrow satin columns will appear to be of a higher density when sewn, so you may want to open up the density a bit.
Note: The program will automatically loosen the density as the shape narrows.
Also be aware that narrow satins will not register as well as wider ones against other stitching. When creating a satin border, try widening the stitch a bit and overlapping the adjacent stitches. This will help prevent gaps without requiring additional stabilizer.