 Branching is typically used to join the underlay of multiple satin
columns, often for lettering; however it can also be used to travel through a
set of objects, beginning and ending where you select.
Branching is typically used to join the underlay of multiple satin
columns, often for lettering; however it can also be used to travel through a
set of objects, beginning and ending where you select. Branching is typically used to join the underlay of multiple satin
columns, often for lettering; however it can also be used to travel through a
set of objects, beginning and ending where you select.
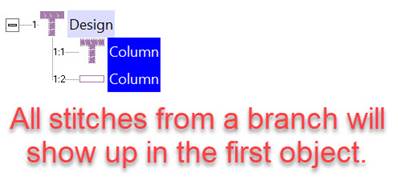
To branch a set of objects, select them and click the Branch button, which is to the right of the Path tools. Branched objects will be grouped if they are not already. To un-branch, select the first object and click the Branch button off. Unbranching will ungroup if the objects were not previously grouped.
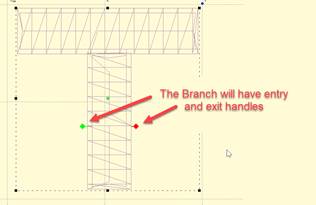
To set the entry and exit points for the branch, select at least the first object in the branch. The entry and exit handles can lie on the outline of the shape, or slightly outside it, which allows you to see them better (even though the stitching will always begin on the outline.)
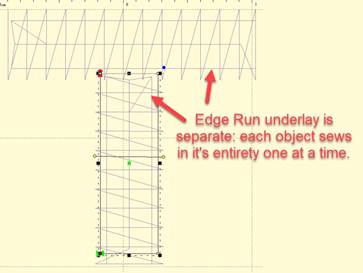
Here you can see the underlay for both objects has been sewn before any topstitching:
Branch objects will need to touch in order to form a group. Objects that are left on their own or in groups separate from each other form a subgroup, which will be branched together and then into the whole branch as one.
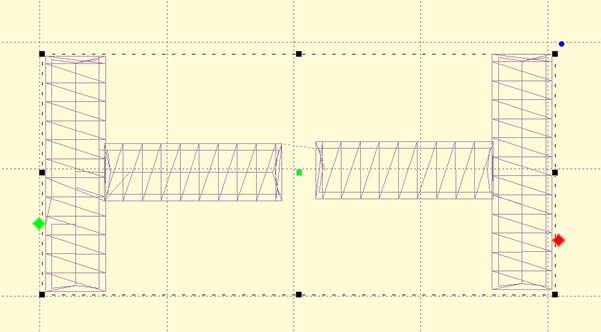
Here you can see that the whole subgroup on the left will sew first, as the branch ends in the subgroup on the right:

If we move the entry and exit to the same side:
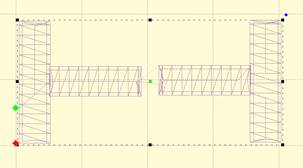
We can see that the branch will travel from the entry through the first subpath, sew the second subpath, then come back and sew the first subpath to its completion, ending at the exit point. Subpath stitching will always have ties and a jump set. If a nested run is desired, the “Preference->Files->When Saving->Run when jumps are small” should be used.
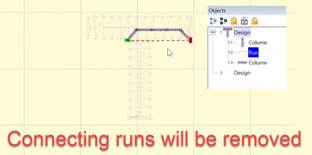
Objects that wholly contain other objects can produce unpredictable results, so don’t do that with branching. However, if single runs were used within a set of satins, then those will be discarded, as the branching operation will provide its own transition runs.
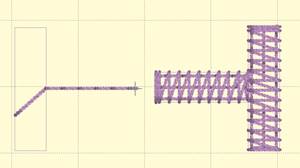
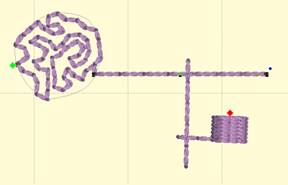
Objects of different types can be branched:
It is usually unwise to branch single runs, as the transition runs that will go under them are likely to cause obvious weight to the run. But if your single run is a bean, stemstitch, backstitch, etc. then your design should sew just fine.
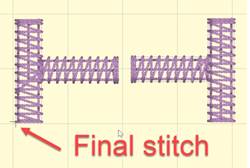
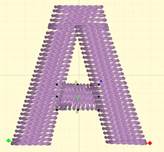
When a set of objects is branched, the sequence of those objects will be determined by the branch, not the order in which they were digitized. The exception to this is fully-digitized satin columns (not auto-columns). When a branch encounters a set of fully-digitized columns, it attempts to preserve the order of digitizing. The purpose of this is lettering. In most embroidery, the order of overlapping adjacent objects is not terribly important, but in lettering, this can be much more important as the eye is used to seeing things a certain way. For example, in the following letter ‘A’ the center horizontal bar should appear underneath both the left and right vertical strokes regardless of the branch exit:
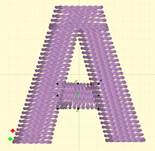
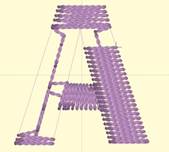
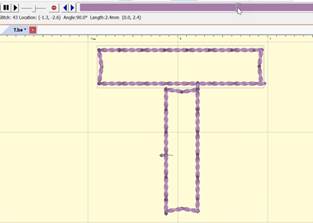
To accomplish this, the topstitching of the branch will be done in a reverse fashion to end up at the exit, as seen in the above image, which shows the letter partially stitched.