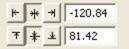
You can precisely position designs using these buttons. The three buttons on the (top, left) control the display of the x-axis position. There are Left, Center and Right, which means that when you have the Left button set, the display will be of the left edge of the design.
Similarly, the bottom three buttons control the vertical axis, top, center and bottom respectively. The position controls are very useful for creating tiled patterns.
Your best friends will be the top ruler and left ruler along the edge of the Design Page. You will notice that center of the ruler is “0”. To the left of “0” is -. To the right of “0” is plus. Let’s place a design on the design page and get started with Precise Position!
1. Decide what size embroidery hoop you are going to use and open it onto the Design Page. You will notice that there are four quadrants inside the hoop.
2. Open a design onto the design page.
3. Place the design in the top left quadrant. Note the numbers in the x and y location boxes. (-47.17 and 50.25)

4. Select the design and right click to copy and then right click to Paste the design.
5. Click on Flip Horizontally .
6. Delete the minus (“-“) from 47.53 and hit enter. This will move the copied design to the right top corner.
7. Select the design and rigt click to copy and then right click to Paste the design.
8. Click on Flip Vertically.
9. Place a minus (“-“) next to 50.14 in the y location box. (-50.14)
10. Hit enter. The design moves to the bottom right corner.

11. Copy and paste the design in bottom right corner.
12. Click on Flip Horizontally.
13. Place a minus (“-“) next to 47.53 (-47. 53) in the x location box. Hit Enter.
14. Your frame is now complete!
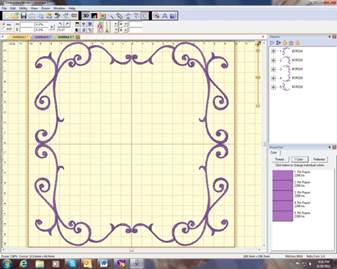
This is a great way to align your designs without the frustration of where you placed the first design and how to get the others to follow suit.