Many of the included designs hold one or more baselines or templates. A baseline is merely a position that the text will appear within the design. The baseline is added by the digitizer to help you with the placement of your lettering.
A template is a shape into which a lettering design will be positioned and distorted.
The use of baselines or templates in the design is up to the user. There is a lot more information on those topics in the Embrilliance Platform manual.
To specify the lettering will use the baseline or template, rename the lettering design by adding a 1 to the end of the name. The lettering will then position itself to the baseline automatically.
Where there are two baselines, rename the second lettering design by adding the number 2 after it, ex: Letters 2.
The number 1 is used after the name in order to link the lettering to the template in the baseball design.
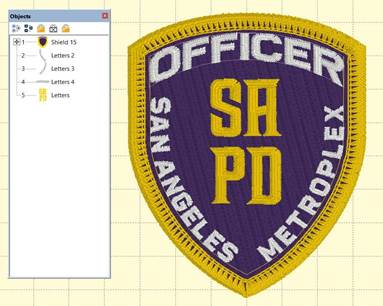
Where a template is used, the same naming convention applies. When a lettering design that’s used in a template is selected, it is not shown as it will appear in the template. This allows for adjustment of character position relative to each other. To see the design in the template, click off it to deselect it.
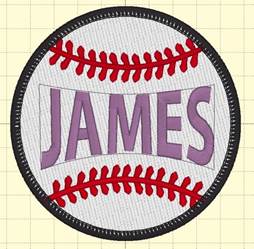
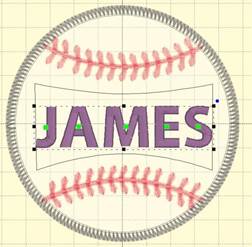
Left: Lettering design is not selected. Right: Lettering is selected.
When using templates and baselines, the number of each is required, in order for the program to match the lettering to the correct one. Some designs have multiple placement objects, therefore the Notes tab is used to display the numbers required.
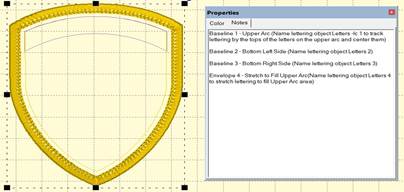
Use Notes tab to see the template name linkage.
Some baselines will require you to use additional commands for centering, using the top of the text to apply to the line, etc. In this case, command flags are used in the names, following the number. Ex: Letters 1 –c –t which means use template item 1 with centered on top of the text.
On some designs there is the option to use a baseline or an envelope, which provide different effects. Look at the word ‘OFFICER’ to see the difference.
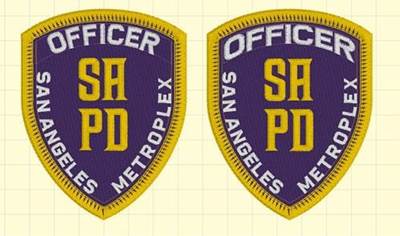
Left is a baseline, right is an envelope.
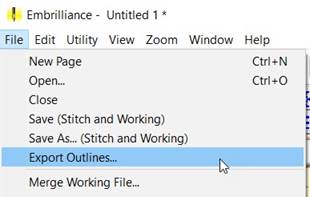
Once a patch shape is made, but before duplicating it, if sewing as two parts, you can export the shape directly to a file for use in electronic cutting machines. Some machine files are supported directly, but you can also export a .svg file for import almost everywhere. This is accessed from the File menu > Export Outlines.
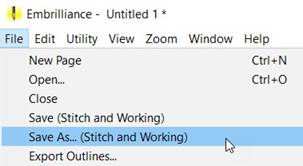
If you’re new to embroidery software, you need to know that there are files which contain information for the program, known as working files, and files that only contain instructions for the machine, known as stitch files. Always save your working file as this lets you edit your patch if you need to in the future. The stitch file is available in almost every machine format: .DST for commercial, .PES for Brother, .EXP for Bernina, .JEF for Janome, etc.
Some patch makers sew directly onto fabric yardage, and they use any normal stabilizers for that purpose. The patches are then cut out from the fabric with a hot knife. The trouble with this approach is that you can give the patch burned edges which show. The advantage is speed, as the maker can cut lots of patches out in a short amount of time. The selection of cloth is very important.
Some patch makers will prefer to have the embroidery machine do everything, including making the fabric via a freestanding fill. For this approach, a wash-away fibrous stabilizer is used, just as with any freestanding lace project. Another option for this is clear vinyl. If you recall the clear furniture covers that were common in the 1960s and 70s, that horrid material is still available and for better use: To make patches. It is very inexpensive and available at super ‘Mart’ stores. A third option is to use a soft cut away mesh. You’ll have to trim the edge very closely, but the patch looks great. If you have fibers protruding from the edge after cutting, you can try heating them away or simply color them with a marker.
Using traditional applique techniques is a smart way to make the patch. The cut-in-the-hoop method uses the position stitch to mark the placement, and the material stitch to hold it down. Then the user will hand cut around the patch. This is difficult for complex shapes. For that reason, you may want to pre-cut the patch shape by hand or using a cutting machine. The wash-away or clear vinyl backings are good for this approach, the same as the freestanding option mentioned above.
If you are going to use heat, 100% polyester is the desired material, unless there’s another option that heats or melts away. The typical fabric weave is twill. Poly twill is often sold by patch supply companies, and online, but can be harder to find in local fabric shops. The cotton/poly twill is far more common. Do not plan to melt that, because you cannot. It is fine for applique methods.
Sometimes a decorative topping is used for effect. Normally this is added before the material step is sewn.
The edge stitch is designed to use 40wt thread. Using a thicker thread will likely cut out the patch from the stabilizer, and a thinner thread will cause the edge to a bit less dense, which may still be usable.
The story of the creation of the patch edge and Merrowly is on the embrilliance.com website. If you like learning the history of a stitch, it is there.