PatchArtist is a part of the Embrilliance Platform, a suite of products that operate within one program interface on Mac and Windows PCs.
Everyone loves patches. We collect them to show where we’ve been, what we enjoy, and who we are, inside and out.
PatchArtist is a versatile software tool and an extensive collection of resources to allow you to create beautiful patches.
PatchArtist makes use of a program machine embroidery stitch that can emulate an overlock, or merrowing, on the edge of a patch. The patch edge has been a standard for over 100 years, and has a distinctive look. When you have a PatchArtist patch in your hand, you feel as though this was made with traditional tools and skill on the overlock. The amazing part is that you can use only an embroidery machine, thread and stabilizer to get one-of-a-kind patches.
A basic feature list includes:
•Merge and save machine embroidery design files from virtually any source.
•Export cut-files.
•Create patch edges to wrap a page, as a circle/oval, square/rectangle with adjustable corner radius.
•Use pre-made patches or choose from well over 100 shapes in the included Library.
•Includes two sets of fonts: Uniform/Block small + micro and 60wt. and Fun fonts for name patches or any other embroidery use.
•Color Sort for multiple-patch layup.
•Create objects compatible with StitchArtist 3.
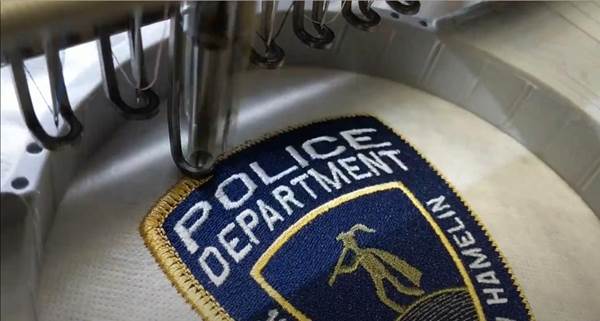
PatchArtist comes with patch shapes that have been used on commercial uniforms for many years. These shapes are the same size and aspect ratio as you would expect when creating police, fire and military patches for actual use by responders. Included are rockers and namedrop templates for ease of use.
PatchArtist also comes with two sets of fonts: One set is designed for those uniform pieces, and the other is for fun. Uniform patches often require official versions of block text, specifically chosen to match a style guide or service. In embroidery, the designer can often use a nearest-matching font and adjust single letter shapes as needed. In this set, however, there are not only block fonts, but sets of fonts with mini and 60wt small versions. And there are several United States military branch fonts included, designed to fit the style guide of those branches.
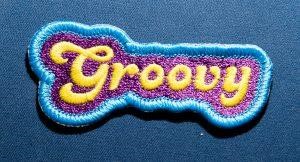
For fun, there is a collection of fonts with various styles from swirly, retro to motorcycle. One major benefit of this set is that a patch can be made, one that exactly outlines a name made using the fonts.
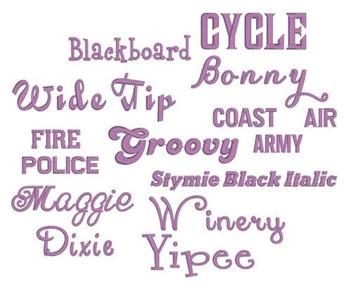
Included fonts
PatchArtist can automatically create a patch for anything on the design page. With a single menu selection (Utility > Add Patch Edge) you can automatically wrap the page designs in a custom shaped patch edge or a circle, rectangle or rounded rectangle (with adjustability).
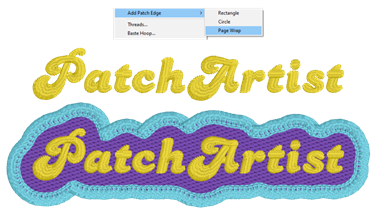
Page Wrap function from Utility menu
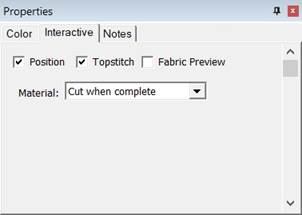
Properties for patch edge
If you are unfamiliar with the Embrilliance Platform itself, please do read the help or manual (same content.) It will explain things like serial numbers and how they activate different parts of the program.
When the program runs, it checks your serial numbers to see what products are licensed. If none are, this is a free mode called, ‘Express’ which will also present a window for you to enter a serial number if you have one. Here, you type in your PatchArtist serial number. If you already have serial numbers in the Platform, use the Help menu > serials to add the number. You will have to restart the program (not the PC).
PatchArtist contains a lot of content; designs, fonts, etc. which take up some space. As such, that content is not all installed with the Platform. You will need to use the Embrilliance downloads page to get the installer for that content. It will come as an Embrilliance installer file with the .BX extension. You may have seen that on many fonts sold by nearly everyone in the industry.
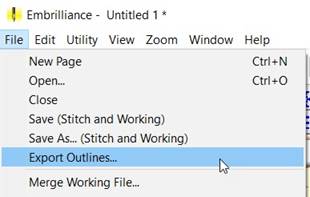
Once installed and run with the serial number, PatchArtist adds a command to the File menu > Export Outlines which is used to save a cut-file for the patch shape. There is also the Utility menu which includes Add Patch Edge with three options for Circle/Rectangle/Page Wrap. In the Library the Embrilliance: PatchArtist collection will be added with several sets of designs, sorted by shape or utility.
Knowledge of the basic construction of a patch is necessary. A patch will consist of some optional steps:
•Position: Use this to establish where in the hoop the patch will be embroidered. Any applique would normally fully cover this stitch. Position stitches can also be used on fabric to create cutlines so that the fabric can be hand-cut into appliques.
•Material: When an applique fabric has been placed, it will be anchored with stitches.
•Topstitch: The actual faux-overlock edge of the patch.
•Design elements: Any names or designs of your choosing that will be contained in the patch.
For many, if not most, cases, the entire patch steps can be completed before the design elements. For beginners, this is the recommended method. When making patches, try to use designs that are lightly stitched.
If you think your design will pull the completed patch away from the stabilizer, you can sew the topstitch of the patch edge as a final step. To do this, wait until your design is complete, then copy the patch design. Paste it. This will place it over top of the original, but it will be the final design in the sewing sequence. Then you can adjust the properties of the patch to cause the final one to sew only the edge, and have the initial one not sew that edge. This ability to make patches in 2 steps, with the design elements between, does mean that the patch may shift slightly in the hoop before the final stitch, and registration could be an issue. You’ll have to look closely at it, or simply try it.
PatchArtist provides a controlled Interactive design for the patch. Construction styles are selectable.
•Freestanding: Patches can be made from only thread with a freestanding background on an appropriate stabilizer (wash-away, vinyl, etc.)
•Directly on yardage: Simply embroider as normal and cut or hot-cut later.
•Applique: Traditional methods can be used. You can also save a cut-file or .svg to allow for electronic cutting. If you do not have the perfect color fabric, PatchArtist has the option to add a light sketch-style fill for color and texture to the background of the patch.
Options for patch
There are three basic steps in an applique, which essentially is how a patch is constructed. There is a position stitch, which runs showing the machine operator where the applique or patch fabric will need to be in the hoop. The Material stitching sews the applique in place, or replaces it using a fill. Then the final edge, that which makes the faux-overlock, is called the topstitch.
Selectively checking or unchecking the boxes for the stitch steps is used in situations where the patch is assembled in other orders, for instance, when the topstitch is desired to run as a final step after all the rest of the patch is complete. Then, there are actually two patch designs, identical to each other, with the earlier one doing all the non-topstitch work, and the final one doing only the topstitch work.
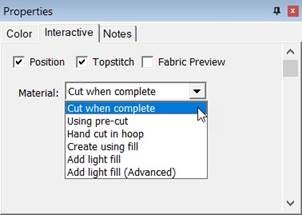
Cut When Complete
When stitching the patch directly onto yardage, the patch will need to be cut from the cloth once it is completely sewn. This process requires no applique steps, so they are removed from the automation of the patch edge.
Using Pre-Cut
A pre-cut applique is created either by hand or machine. Selecting this option ensures that the position step is made, but the material tackdown is run with the topstitch, saving a color stop.
Hand Cut in Hoop
This option ensures all color stops. The position stitch runs, then the user lays the fabric over it. This is followed by a tackdown stitch in a separate color. The machine then stops and the user carefully cuts the edge of the applique off, while the project is still hooped. Once the excess material is cut away, the topstitch is run, including the patch design itself.
Create Using Fill
When stabilizer is hooped without fabric and no applique is desired, this will create a fill similar to a freestanding lace fill. Normally, wash-away mesh stabilizer or vinyl backings are hooped, but there are others, such as light cut-away (if you are good at cutting it closely.) This method is a favorite when the exact color twill is unavailable, or a very few patches are being made.
Add Light Fill
Sometimes the twill color is not exact for the desired result, or there may be an artistic reason for wanting to add texture and color to the background of the patch before the design is sewn. The light fill option adds that color and texture using a horizontal fill that will not affect the overall density of the patch in any noticeable way.
The Advanced version of this has additional properties for the user to control, however this is not normally adjusted. It is added here for those skilled digitizers who want to make slight adjustments to refine their patch.
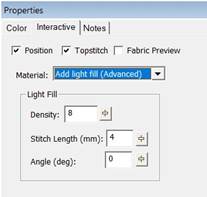
Density, Stitch length and Angle are adjustable in the Light Fill (Advanced).
The Utility menu will have an added option when PatchArtist is installed. Add Patch Edge will create patch shapes in three styles: Rectangle, Circle, Page Wrap.
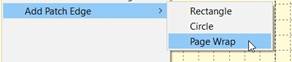
Three types of automatic patch creation
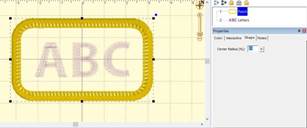
Rectangle, with curved-corner properties
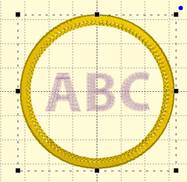
Circle which can be sized to form an oval.
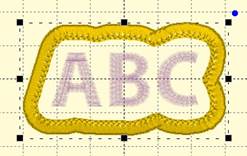
Automated shape that wraps the design on the page.
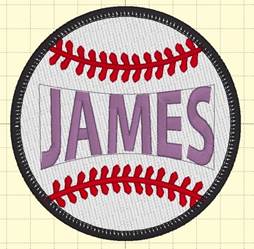
Some patches come pre-made with lettering baselines. To use these, add a lettering design to the page, and be sure it is positioned after the patch design itself. The lettering will generate when you type in the text box, telling it what to say.
Many of the included designs hold one or more baselines or templates. A baseline is merely a position that the text will appear within the design. The baseline is added by the digitizer to help you with the placement of your lettering.
A template is a shape into which a lettering design will be positioned and distorted.
The use of baselines or templates in the design is up to the user. There is a lot more information on those topics in the Embrilliance Platform manual.
To specify the lettering will use the baseline or template, rename the lettering design by adding a 1 to the end of the name. The lettering will then position itself to the baseline automatically.
Where there are two baselines, rename the second lettering design by adding the number 2 after it, ex: Letters 2.
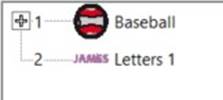
The number 1 is used after the name in order to link the lettering to the template in the baseball design.
Where a template is used, the same naming convention applies. When a lettering design that’s used in a template is selected, it is not shown as it will appear in the template. This allows for adjustment of character position relative to each other. To see the design in the template, click off it to deselect it.
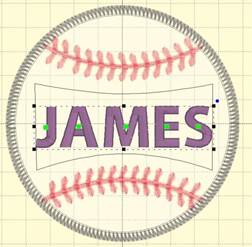
Left: Lettering design is not selected. Right: Lettering is selected.
When using templates and baselines, the number of each is required, in order for the program to match the lettering to the correct one. Some designs have multiple placement objects, therefore the Notes tab is used to display the numbers required.
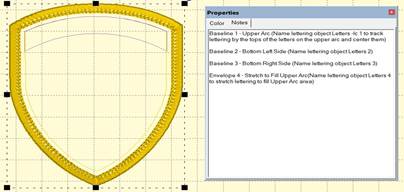
Use Notes tab to see the template name linkage.
Some baselines will require you to use additional commands for centering, using the top of the text to apply to the line, etc. In this case, command flags are used in the names, following the number. Ex: Letters 1 –c –t which means use template item 1 with centered on top of the text.
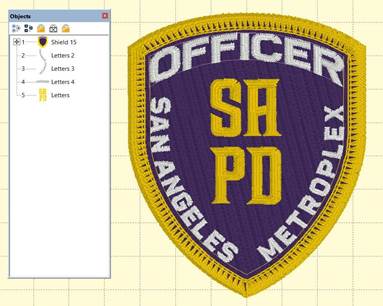
On some designs there is the option to use a baseline or an envelope, which provide different effects. Look at the word ‘OFFICER’ to see the difference.
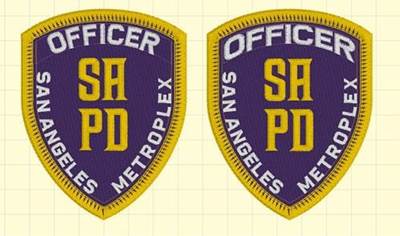
Left is a baseline, right is an envelope.
Once a patch shape is made, but before duplicating it, if sewing as two parts, you can export the shape directly to a file for use in electronic cutting machines. Some machine files are supported directly, but you can also export a .svg file for import almost everywhere. This is accessed from the File menu > Export Outlines.
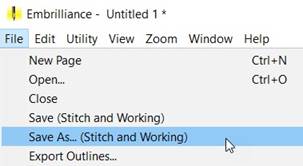
If you’re new to embroidery software, you need to know that there are files which contain information for the program, known as working files, and files that only contain instructions for the machine, known as stitch files. Always save your working file as this lets you edit your patch if you need to in the future. The stitch file is available in almost every machine format: .DST for commercial, .PES for Brother, .EXP for Bernina, .JEF for Janome, etc.
Some patch makers sew directly onto fabric yardage, and they use any normal stabilizers for that purpose. The patches are then cut out from the fabric with a hot knife. The trouble with this approach is that you can give the patch burned edges which show. The advantage is speed, as the maker can cut lots of patches out in a short amount of time. The selection of cloth is very important.
Some patch makers will prefer to have the embroidery machine do everything, including making the fabric via a freestanding fill. For this approach, a wash-away fibrous stabilizer is used, just as with any freestanding lace project. Another option for this is clear vinyl. If you recall the clear furniture covers that were common in the 1960s and 70s, that horrid material is still available and for better use: To make patches. It is very inexpensive and available at super ‘Mart’ stores. A third option is to use a soft cut away mesh. You’ll have to trim the edge very closely, but the patch looks great. If you have fibers protruding from the edge after cutting, you can try heating them away or simply color them with a marker.
Using traditional applique techniques is a smart way to make the patch. The cut-in-the-hoop method uses the position stitch to mark the placement, and the material stitch to hold it down. Then the user will hand cut around the patch. This is difficult for complex shapes. For that reason, you may want to pre-cut the patch shape by hand or using a cutting machine. The wash-away or clear vinyl backings are good for this approach, the same as the freestanding option mentioned above.
If you are going to use heat, 100% polyester is the desired material, unless there’s another option that heats or melts away. The typical fabric weave is twill. Poly twill is often sold by patch supply companies, and online, but can be harder to find in local fabric shops. The cotton/poly twill is far more common. Do not plan to melt that, because you cannot. It is fine for applique methods.
Sometimes a decorative topping is used for effect. Normally this is added before the material step is sewn.
The edge stitch is designed to use 40wt thread. Using a thicker thread will likely cut out the patch from the stabilizer, and a thinner thread will cause the edge to a bit less dense, which may still be usable.
The story of the creation of the patch edge and PatchArtist is on the embrilliance.com website. If you like learning the history of a stitch, it is there.