 The Objects view shows the designs that have
been opened or merged onto the Design Page and objects within those designs.
The Objects view shows the designs that have
been opened or merged onto the Design Page and objects within those designs.
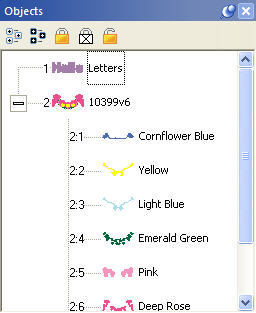
Notice that the designs are numbered in the Objects view. The designs or objects are numbered in the order that they have been opened or merged onto the design page. In the illustration above lettering was opened onto the Design Page first. So, it has been numbered 1. The following merged design is number 2 in the sequence. When re-sequencing objects the numbers will change accordingly.
Using the Objects view designs may be selected, sequenced and deleted. The Objects view can display individual objects within designs where allowed. Stitch files (merged embroidery designs) are one example of a Design Type that allows the display of individual objects within the design. Clicking on the ‘+’ at the left of the design will expand that design in the Objects view. Under that design will then appear the individual objects.
Using the Objects view, objects may be selected, re-sequenced or deleted.
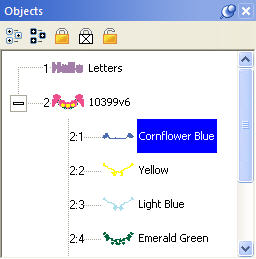 Using the Objects view you can select any number
of Designs or Objects, regardless of whether or not they are locked, hidden or
grouped. This allows for editing of objects or designs without ungrouping. For
example, the following design is all grouped so that it can be moved around the
page as a single design. However, you may want to select just the second color
to change it, re-sequence it or even delete it.
Using the Objects view you can select any number
of Designs or Objects, regardless of whether or not they are locked, hidden or
grouped. This allows for editing of objects or designs without ungrouping. For
example, the following design is all grouped so that it can be moved around the
page as a single design. However, you may want to select just the second color
to change it, re-sequence it or even delete it.
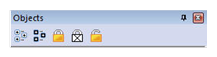
The toolbar on the Objects view also has selection options including ‘Select All’ which is the first button on the left. If the Main view is active you can also type Ctrl-A to select all or you can use the Edit menu for this option too.
The second button will reverse the current selection. This means that whatever you have selected will no longer be selected, but everything else will become selected. This is useful when you want to delete everything except for a single design element.
Using the Objects view you can select multiple designs or objects. If a single object is selected, you can use the shift key while clicking a second object and this will select a range of objects: Everything in between the two will be selected.
If you use the Ctrl key while clicking on objects, you can singly select designs or objects. To de-select an object that’s already selected, Ctrl-click on it. This will reverse its selected state.
You can also drag a rectangle around objects in the Objects view to select whatever is in the rectangle.
Note: Dragging enables Auto-Scroll, and your view will move allowing you to select items that weren’t initially visible.
If you want to select all objects of a given color, select one of the objects as described above. Then use menu option, Edit->Select by Color. This will find and select all the objects on the page which have those same colors in them. This is a handy feature to change the color of several things at once.
As you drag on the Objects view, you may come near the top or bottom edge. This will cause the view to scroll thus enabling you to drag into a position that’s not currently in view.
If you want to prevent designs or objects from being selectable in the Main View, you can ‘Lock’ them. Locking an object does not affect its grouping; it only prevents it from being clicked on. The second button, a white lock with an ‘X’ on it, will not only lock the design or object, but will prevent it from being displayed in the Main View.
To unlock something, click the third lock, which appears as an open lock icon.
Note: Locking does not prevent you from selecting it in the Object tree, where it can be re-sequenced, copied, or deleted.
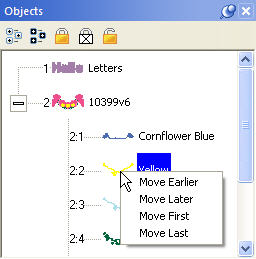 The sequence of objects and designs can be
changed using the Objects view. One way is to right-click on a selected item
which will cause a pop-up menu to be displayed. That menu has options to move
items earlier or later in the sequence.
The sequence of objects and designs can be
changed using the Objects view. One way is to right-click on a selected item
which will cause a pop-up menu to be displayed. That menu has options to move
items earlier or later in the sequence.
You can also drag and drop items in the tree to re-sequence them. Dropping an item (let’s call it ‘B’) on another (called ‘A’) will place that dropped ‘B’ item right after ‘A’ in the sequence. If you drag an object onto the design icon, then that drop will be placed at the head of the design.
You can also re-sequence selected designs and objects using the ‘Sequence Objects’ command on the Edit menu.
Often you will want to delete a section of stitches from a design that has been merged. When those stitches are all grouped as one color this is easily accomplished using the Object View. Open the design using the ‘+’ in the tree. Next, select the color you want to delete. Next, choose ‘Delete’ from the Edit menu or use the ‘Delete’ key on your keyboard.
Below, the first color of the design is selected. Simply press ‘Delete’ on your keyboard to remove the first color along with the stitches associated with it.
Note: Another way to delete is to use the menu, Edit->Delete.
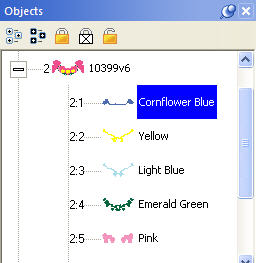
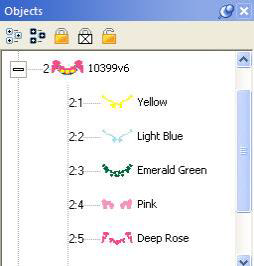
Left: Color is selected. Right: Color has been deleted.