Delayed Generation
 When you
tell an object that it is to be a certain stitch type, the stitches will
automatically generate. Also, when you adjust or edit the object, the stitches
will generate for you. But what if you want to do a complex series of edits on
the object? It might be desirable to turn the automatic generation off for a
while. You can do this with the ‘Delayed Generation’ button. As long as the
button is pressed, and you are in ‘Create’ mode, your stitches will not
generate.
When you
tell an object that it is to be a certain stitch type, the stitches will
automatically generate. Also, when you adjust or edit the object, the stitches
will generate for you. But what if you want to do a complex series of edits on
the object? It might be desirable to turn the automatic generation off for a
while. You can do this with the ‘Delayed Generation’ button. As long as the
button is pressed, and you are in ‘Create’ mode, your stitches will not
generate.
Generate Now
 When you want to generate
stitches on an object or set of selected objects, click the ‘Generate now’
button. If nothing is selected, the program will look for any objects needing to
be generated and will generate them accordingly. This button is useful when
Delayed Generation is turned on – you control what gets generated and
when.
When you want to generate
stitches on an object or set of selected objects, click the ‘Generate now’
button. If nothing is selected, the program will look for any objects needing to
be generated and will generate them accordingly. This button is useful when
Delayed Generation is turned on – you control what gets generated and
when.
Default Drawing of Line/Curve
 The usual mode of drawing with
points is to draw with curved points and use the Ctrl key to draw a line. This
may be undesirable for some art. You can use this button to switch the way that
operates – pressing it will cause drawing to default to a line, and the Ctrl key
will cause points to be a curve. Note that using the Shift key to make a line
constrained to 15-degree angles will work either way – you can constrain the
line angle as long as you are not making a curve.
The usual mode of drawing with
points is to draw with curved points and use the Ctrl key to draw a line. This
may be undesirable for some art. You can use this button to switch the way that
operates – pressing it will cause drawing to default to a line, and the Ctrl key
will cause points to be a curve. Note that using the Shift key to make a line
constrained to 15-degree angles will work either way – you can constrain the
line angle as long as you are not making a curve.
Auto-scroll Toggle
 When drawing, the edges of the main
view have an area that act as an auto-scroll area – if you move your mouse in
that area while drawing your page will scroll automatically which gives you more
room to continue drawing. Sometimes this is undesirable, and the action can be
toggled on and off using this button. Note you can also use the arrow keys while
drawing to scroll 1cm per key click. And holding the spacebar will let you pan
the screen by dragging it with the mouse.
When drawing, the edges of the main
view have an area that act as an auto-scroll area – if you move your mouse in
that area while drawing your page will scroll automatically which gives you more
room to continue drawing. Sometimes this is undesirable, and the action can be
toggled on and off using this button. Note you can also use the arrow keys while
drawing to scroll 1cm per key click. And holding the spacebar will let you pan
the screen by dragging it with the mouse.
When an object is selected, you can select all other objects
using the same style or stitch type by adding the Control key to a right-click.
Ctrl-Rt-Click > Select by…
Carving lines
 Areas filled with stitches such as
Satin Columns and Fills can be given additional texture using Carving Lines.
Carving lines are additional shapes that can be added to objects in a very
similar manner to adding holes. Use the ‘Add Carving Line’ button on the Tool
Pane to begin a carving line, and select the input method (usually Point Input)
to begin drawing. Draw a path over the object.
Areas filled with stitches such as
Satin Columns and Fills can be given additional texture using Carving Lines.
Carving lines are additional shapes that can be added to objects in a very
similar manner to adding holes. Use the ‘Add Carving Line’ button on the Tool
Pane to begin a carving line, and select the input method (usually Point Input)
to begin drawing. Draw a path over the object.
The carving line generates needle penetrations where the
normally-generated stitches intersect the carving line.
The only real caveat to carving lines is that in high-density
areas, your fabric may lash up as the needle is penetrating closely together.
For this and other reasons, some designers create two areas of fill, overlaid on
one another, each at half density. This adds texture, can reduce fabric pull,
and carved lines will add minimal impact.


Using Styles
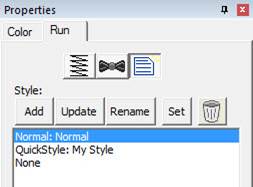
Styles allow for repeated use of properties on a given type of
object. There is a style button on the top, right of each object property page.
When an object has been assigned a style, that style will be highlighted in the
style list, shown on the Style properties for the object. If an object was
assigned a QuickStyle, but has been modified, it will be given an asterisk at
the end of the style name.
The Styles Property Window
Once you change the property of an object you just made, the
program takes the properties of that object and uses them for the next object
you make of the same type. This is the “Current Style.” For example, if you
create a run and set it to a Bean stitch, the next run you create will start out
as a Bean also. Although it may not be a named style, the current properties are
important, as they are used when creating an object.
Updating the ‘Current’ Style
The ‘Set’ button will use all of the properties as shown to
set the ‘Current’ style for new object creation; when you create a new object of
that same type (run, column, etc.) it will be created with the same settings as
the first object now selected.
Alternately, if you have an object whose style is “None” and
you click ‘Update’ it will likewise set the ‘Current’ digitizer settings to
match that object.
When you begin creating objects having just run the program,
the default styles are being used, called “Normal.” These have been tested to be
reasonable for all-around conditions, but naturally properties exist for a
myriad of reasons.
To remove the QuickStyle from an object, click “None.” This
will have no effect on the properties of the object; it just removes the style
setting.
When you have an object that has its properties set a certain
way, you can save those properties as a QuickStyle. Using QuickStyles allows you
to remember a set of property settings that sewed perfectly for a project, or
simply to match prior objects you’ve created.
Adding a QuickStyle
When you create a style based on a selected object, you can
name it. This is called a QuickStyle, and the style itself resides with the
design page being used, and on your computer for future use. To do this, click
the ‘Add’ button.
If you load a document with a style that is not on your
system, it will be referred to as a “Page Style”. If you would like to add this
style to your collection for use later, you can click the ‘Add’ button.
Renaming a QuickStyle
If you wish, you can rename the style with the ‘Rename’
button. Any object that uses this style will show the new name in use when the
style page is shown.
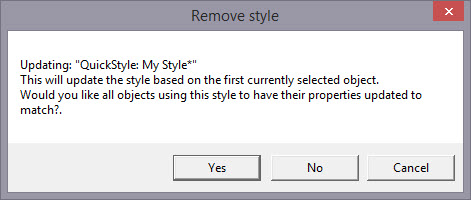
Updating a QuickStyle
When you have modified a QuickStyle-stylized object, and you
want to update the QuickStyle to match the current object properties, use the
‘Update’ button. This means that other objects with the same style set will not
match. Since the main reason for styles is to have all the objects working the
same, there is an option presented to update all the other objects that use the
same QuickStyle to have their properties match the current one.
Removing a QuickStyle
Using the ‘Remove’ button, with the trash can icon on it, you
will remove the QuickStyle from the page, and from your system. Realize in doing
so that other objects on the page, or indeed other files you have created, may
have used that QuickStyle.
As QuickStyles are stored with the page as well, the style
will become a “Page Style” for other documents when you load them, if they had
that QuickStyle applied.
When you remove a QuickStyle, it erases it completely without
affecting the properties themselves. Objects that have had their QuickStyle
removed will not lose their property settings, but will naturally have a style
setting of “None.”
Stylesheets are design collections that have objects that have
properties set to perform digitizing a certain way.
For example, suppose you want to collect a set of object types
that you use to create freestanding lace. You can make a design with those
objects in it. Their shape does not matter, but their properties are what are
important. The objects will have the properties needed to make your lace. You
can then use that Stylesheet at any time to set all the object properties on the
sheet.
Stylesheets allow you to add styles to your Styles lists
quickly and easily. They can also be exported in a .BX installer for use on
multiple computers, or even shared with others.
Stylesheets can be loaded into the ‘current’ digitizer
settings, usually at the onset of creating a new design, but not always – they
can be set as the current properties at any time.
Creating a Stylesheet
Start with a new design page. Now begin by digitizing one
object, and set the properties of that object to your style. You can use a
QuickStyle that you have on hand already to set the properties. You can add as
many objects to the design as you like. Once you have the design how you want
it, use the menu ‘Create->Publish->Stylesheet’:
 ’
’
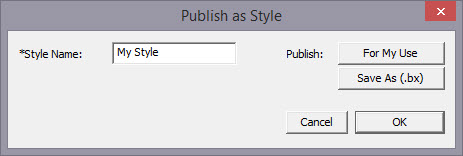
You now have two options for Publishing: Publishing to your
collection of Stylesheets, or publishing as a .BX installer. The .BX option will
also publish to your stylesheet list, but it additionally saves a .BX file to a
location of your choosing.
Here is an example:
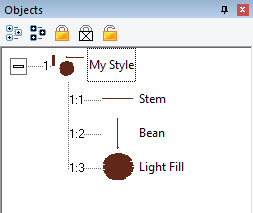
In this screenshot, you can see we have two Run objects,
labeled ‘Stem’ and ‘Bean’. We also have a Fill object, labeled, ‘Light
fill’.
IMPORTANT: Save your working (.be)
file so you can adjust this Stylesheet at a later date if you need
to.
When we publish this Stylesheet, we have these available as
QuickStyles:
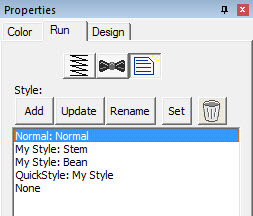
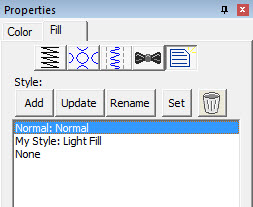
Notice there are now two entries on the Run (left) and one on
the Fill (right).
Setting a Style as Current
The menu ‘Create->Styles…’ calls up the Stylesheet
manager:
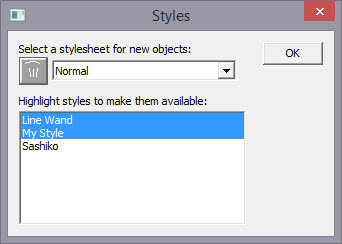
This window is divided into two sections. On the top is a list
of the Stylesheets available to be used to set the ‘current’ properties. The
lower list allows you to highlight any and all Stylesheets you want to have
available for use while creating a design.
Thus, you are not limited to a single Stylesheet, nor are you
restricted to using it only at the start of a design page. You can set the
properties to a style at any time by selecting it in the drop list. And you can
highlight as many stylesheets to be available as you like.
You will notice there are some Stylesheets that exist for you;
Normal (which is the default properties for the program) and ‘Line Wand’ which
is handy to use when generating objects with the ‘Magic Wand Lines’ tool. You’ll
notice that in the image above, there are two Stylesheets selected, “Line Wand’
and ‘My Style’, so here is what we see in the Run properties:
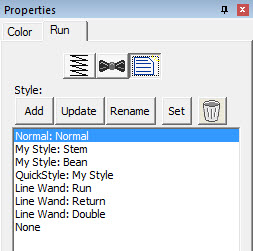
Notice that there are ‘My Style’ and ‘Line Wand’ available.
Also, we had chosen ‘Normal’ as the Stylesheet to use as a current property set,
so the Normal is there as well.
Note that QuickStyles are always available to you; they are
not a particular Stylesheet, but rather a simple set of properties for one
object type.
Removing a Stylesheet
When you select a Stylesheet that you have created, the
trashcan button next to the drop list will be active, allowing you to remove
that Stylesheet from your system completely. (Remember, we told you to save the
.BE file in case you want it later!)
Path Operations
Path operations are advanced graphical tools that help you
quickly get a result shape based on currently selected ones.