Hoops
The hoop that you will view in the Main View is chosen for the Design Page using the Preferences Window also.
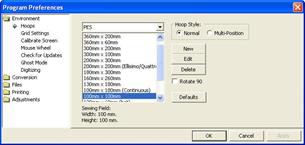
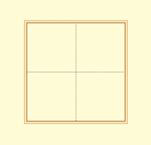
Left: Hoop selection. Right: What a hoop looks like in the Main View.
Using this window you can select different hoops, the selected hoop to be shown rotated 90°, add new hoops of your own creation or edit the selected hoop. The ‘Defaults’ button reloads the hoops that are installed with the program. This is useful if you update the program or have previously deleted some default hoops.
Note that when you create a new hoop or modify an existing hoop, that you are really defining the sewing area, or what is known as the sewing field, not the physical dimensions of the hoop. You must know your machine’s embroidery field as you cannot create a hoop that is larger than what your embroidery machine can sew.
Note: When you create a new hoop, it will become the selected hoop.
Trouble shooting: “I can’t see the hoop and it’s checked in View > Draw Hoop.”
There are 3 primary reasons this can occur:
• A very large hoop may be outside the visible work area
• A very small hoop may be completely covered by the design.
• Designs are outside the range of the hoop and your view is zoomed in, causing the hoop to be outside the currently visible area
Check the status bar at the bottom of the window for hoop information, which displays the selected hoop whether it is visible or not. Zoom out to find the hoop (if it isn’t buried under your design).
 Splitting for Multi-position
Hoops
Splitting for Multi-position
Hoops