When you select a color by clicking on it in the Properties window, you will see the color window appear. This has two tabs, the first of which is to change the color, as discussed in the prior section.
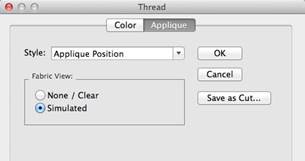
The second tab is used to set applique states on the selected colors. This information is used by the program when removing overlaps, and adds other features such as saving a file for use in applique cutting machines.
Essentials includes the ability to have the Simulated Fabric View.
The StitchArtist includes the use of images.
When a color is assigned as ‘Applique Position’ or ‘Applique Material’ then that color becomes exempt from having its stitches removed. They are likely to be hidden, but they are necessary when sewing the applique design.
Colors can be assigned as applique position or material in three ways:
1. Use the drop list on the Applique tab of the Color Window.
2. Right click on the color ship in the Property window and use the context menu.
3. Name the object in the Object Tree as Applique Material or Applique Position. The words can be abbreviated: “Appliq Mat” or “Appliq Pos” are acceptable
The ‘Material’ layer is used strictly to prevent the removal of stitches – first in the sense that the material stitches themselves are not removed, but additionally that the fabric inside the applique can obscure earlier stitches. As it is not good to have bulky stitches underneath an applique, those are removed. By way of example, you might want to overlap two or more appliques, and where they overlap, you want the minimum stitches necessary. Note that some designs do not have a separate material tack-down color. That’s okay to leave off in most cases.
The ‘Position’ setting is always to be found in applique designs – otherwise they would not be applique. The position of the fabric is sewn down, and then the applique is applied.
Using this information we can do some additional things in the software:
Generate a fabric simulation: The fabric is simulated using the chosen color of the object. You can change this setting, and the color itself ‘live’ in the window to preview the results. When you find a suitable setting, click ‘OK’.

If you have StitchArtist, you can do more, as described in the section, Photo Applique.
The type of stitching is important for the operation of the applique discovery process in the software. Generally, applique position steps are made from single running stitches, which may jump to other sections and/or holes. Most digitizers will do this simple run, and then add tie-off stitches at the beginning and end of each outline. Sometimes the outlines will not close perfectly, but the software overcomes this, as well as the tie-offs. But if the digitizer uses some other stitch, it is possible that the process will not be recognized as an applique when you want it to. The easy way to check is to turn on the fabric simulation. If that looks correct, you are good to go.
Also note that the program is not converting filled sections into appliques. That must be done by the digitizer who created the design. This applique discovery process is to make using existing applique designs easier and more fun.
The Program Preferences have a setting under “Files->When Saving” that can be used to turn on/off the use of applique in the removal of hidden stitches.
Also the use of the Program Preferences under “Printing” can allow selected colors to be printed. This can be useful for machines that scan in a printed output for the purpose of cutting, such as the Scan ‘N Cut.
The software analyzes the shapes created by the Position stitches and then creates a simpler output for the cutters, and saves it to their file. .fcm for Brother Scan ‘n Cut and the .studio Silhouette products, along with .svg and .plt files can be saved. Nearly every cutter can make use of one or more of these formats.
Save the cut file and send it to your machine according to the manufacturer’s instructions.
The ‘Save All’ button will merge all the Position stitches on the design page, whether or not those objects are selected, and the resulting cut file will have all applique elements in it.
Generally speaking, applique steps are;
1. Set the colors as needed.
2. Save the cut file.
3. Save the design file (working and stitch)
4. Cut the applique.
5. Embroider the design.
Alternately, you can still use the image in a print process, and pre-cut the applique by hand. There are a lot of options!
1. Use an image
such as a photograph or fabric swatch inside the applique shape.
2. Create a print that is cropped to the outline, making it easy to hand-cut pre-cut appliques.

3. Print the cropped image on printable fabric or transfer paper for the effect of combined photography and embroidery.

4. Inflate the shape of the outline. When digitizers create a design that will be hand-cut in the hoop, they know that the embroiderer won’t cut exactly at the line of stitching. So when they make the ‘Material’ run, they often simply duplicate the ‘Position’ run – same size, etc. This creates an issue for Pre-Cut Applique as the ‘Material’ stitching will not catch the applique – it is exactly the same size. Using the ‘Inflate’ when saving for cutting machines will create an applique that slightly hides the ‘Position’ and can be held in place by the ‘Material’ stitching.
5. The ‘Position’ is usually a simple enough set of stitches to be processed into output for an automatic cutting machine. These machines will take a file and use that to cut the fabric. Having cut the applique beforehand makes the embroidery process much more rewarding.