Creating corners with satin columns is a bit of an art. When
creating lettering for example, the cornering methods you use will radically
affect how the viewer of the stitched item perceives your embroidery.
 The
simplest form of cornering is to simply turn, with inclinations going around the
turn. When making a hard corner, this results in stitches pivoting around the
inside corner of the turn. If you’re going to turn this way, try beginning to
‘lean’ the stitches into the turn, and when coming out of the corner, give them
some chance to ‘lean back up.’
Surprisingly, most of the time, professionals prefer to simply
turn corners instead of using more complex corner styles, which we’ll describe
next.
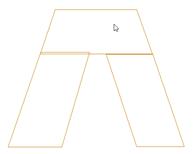
Letters often look better with a set of satin columns, rather
than turning around hard angles. One method commonly used is with three satin
columns: and entry, and end ‘cap’, and the exit stroke. A typical example is
this letter ‘A’:


You’ll see that the cap angle is as ‘flat’ as it can be so
that the stitching is smooth. For registration purposes, you may want to overlap
the cap on top of the entry column. And the exiting column usually is best to be
snug against the cap. In the illustration on the left, notice the slight overlap
of the left column and the cap – barely a stitch is typical.

A hard corner may not be appropriate for a cap. And it may be
so tight that it cannot turn reasonably. In this case, break the column into two
and overlap the corner. Don’t worry about the stitches overlapping each other,
as satin stitches sew quite well even when overlapped. If the density is not too
tight for the thread and fabric, you can even get a blended look.
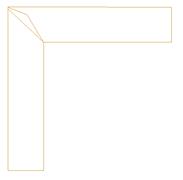
Mitering
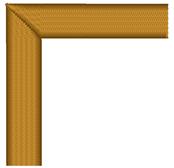
Mitering is a form of overlapping where the exiting column
starts at a ‘point’ and widens out as it leaves the corner. This makes the
stitching resemble a picture frame:


Mitered corners work well for corner angles at 90 degrees,
like a picture frame. Hard turns cause longer miters, which have too many small
stitches, and shallow turns do not need mitering.
 The
simplest form of cornering is to simply turn, with inclinations going around the
turn. When making a hard corner, this results in stitches pivoting around the
inside corner of the turn. If you’re going to turn this way, try beginning to
‘lean’ the stitches into the turn, and when coming out of the corner, give them
some chance to ‘lean back up.’


