 Satin columns are versatile objects, and this property page allows
you to use the column in a few styles. “Normal” satin stitches are what you
almost always think of with satins; they go left-to-right and back again, making
a smooth, narrow, continuous stitch. But you also have the option for Contour
and Fringe stitching styles available.
Satin columns are versatile objects, and this property page allows
you to use the column in a few styles. “Normal” satin stitches are what you
almost always think of with satins; they go left-to-right and back again, making
a smooth, narrow, continuous stitch. But you also have the option for Contour
and Fringe stitching styles available.
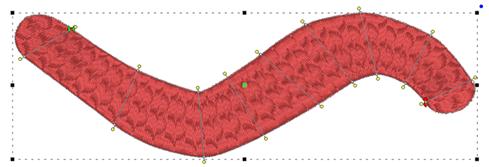
Pass Count
3 and 5 pass whip stitches are available to create more
texture. The thread does build up, but the program opens the density very
slightly to allow for it. The use case for this is to provide a more vintage, or
even simulating a handmade element in the embroidery.
Satin columns are one of the most-used stitches, and they have
a lot of properties available. The most important of which is the density.
Remember that density is measured in stitch points, which are tenths of a
millimeter. The bigger the distance, the lower the density. Normal density for
satin columns is 4 points to 5 points unless a fine thread and tightly woven
fabric are used. Often, the 5 point density is preferred as it will not push the
fabric around as much, and still provides nice coverage.
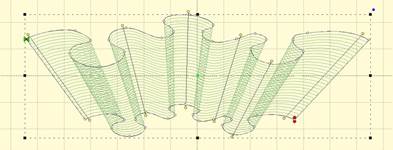
When choosing the patterned topstitch, a normal smooth satin
is the default, however you can adjust the patter to appear like a fill pattern
that curves with the stitching. Each pattern can have its stitch properties
adjusted. Stitch Length in the pattern relates to the size of the pattern that
is made. If you make your pattern too wide, it will not be visible unless the
satin itself is very wide. Here you can see how a satin pattern will turn with
the stitching:
The Edge Pad is a means of protecting the edges of the
stitches from have excessive needle penetrations that can pull on the fabric and
pucker.
When patterning, the needle penetrations can lie next to one
another causing the fabric to lash or even cut. If this is a danger for the
fabric being embroidered, set the “Reverse” to “None” which means the pattern
will only occur on every other stroke of the satin. The pattern effect will be
lighter, but the embroidery will be better and the fabric will not have as many
cuts.
The pattern of the satin also has compensation and gradient
properties. Please refer to the Fill Pattern section of Fill Objects for images
and further description.
Compensation
Left: Level 1 & 2, Right: Level 3
Compensation helps create embroidery that matches the image,
understanding that the process of sewing the design will create distortion as
it is happening. With compensation, the endpoints of the lines in a fill are
stretched out slightly past the edge of the shape. This helps with registration
issues because as the lines are sewn, the fabric is pulled in slightly
(shortened), so the longer lines will reach the spot intended to be covered.
You can use a minimum value, usually 0 – 3 points,
depending on what the fill is lined up against. If your fill has a wide
difference in the width of the runs, in other words some narrow parts and some
fatter parts, you may want to use a percent for the compensation. We
suggest keeping it a small value, 2-3%. It will be kept in check by the Max
value though, even if you use a high percentage.
While the compensation numbers sound like something you should
use, they’re really there more for the professional who uses them all the time.
Most of the time, simply adjusting the shape to overlap anything that neighbors
it will do a fine job of handling registration issues.
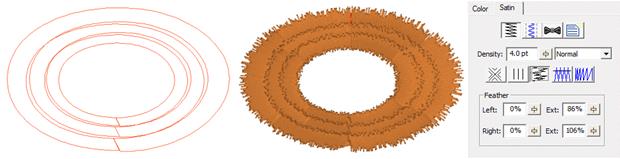
Feathering the edges of satin columns is a good way to
simulate animal fur. Overlap multiple layers to make a more realistic
appearance. In this example, three satin rings were set with feathered edges.
The rings sewed outer-to-inner, and overlap slightly.
Split
A split stitch in the column simply means that the needle will
land in rows, lengthwise along the column. You can set the number of split
columns, the minimal stitch value (to avoid fabric cuts) and you can avoid the
reverse stitch pattern, which helps preserve the look of the satin column. Here
is a column split into three:
 Satin stitches are good at covering the fabric, but they have
challenges, especially along the edge, where tightly placed dense stitches can
penetrate the same hole in the fabric or even cut the fabric. You may have sewn,
for example a knit shirt, and had the edges of satin stitches create holes in
the fabric. For this reason a parallel or zigzag underlay is often used. It
provides coverage while pulling the fabric at slightly different angles and that
can allow the top stitching to have reduced density.
Satin stitches are good at covering the fabric, but they have
challenges, especially along the edge, where tightly placed dense stitches can
penetrate the same hole in the fabric or even cut the fabric. You may have sewn,
for example a knit shirt, and had the edges of satin stitches create holes in
the fabric. For this reason a parallel or zigzag underlay is often used. It
provides coverage while pulling the fabric at slightly different angles and that
can allow the top stitching to have reduced density.
Satin also has the issue of tension. Short stitches in the
same direction, laid next to each other, builds up stress in the fabric,
gathering it in toward the middle of the satin stitch. This can cause
registration issues with subsequent stitching. This can be managed by binding
the stabilizer to the middle of the satin with a center run, or a pair of edge
runs that travel just inside the shape. The edge runs also have the added
benefit of lifting the edges of the satin up, out of the pile of the fabric. For
these reasons it is not uncommon to use a medium density satin with a lot of
underlay.
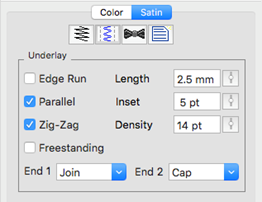
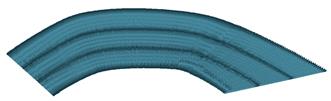
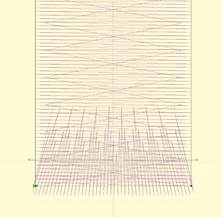
In the underlay properties, the “Edge Run” will create runs on
either side of the satin, just inset by an amount controlled by the Inset field
on the property page. The inset for the edge run is usually is set to fall just
inside the stitching – perhaps a half-needle with or slightly more, which allows
some relief around tight corners. The stitch length of the edge run is also
adjustable; use smaller stitches for tight, narrow columns and longer ones if
you want to reduce the stitch count, or are worried about cutting the fabric.
The default is usually sufficient though.
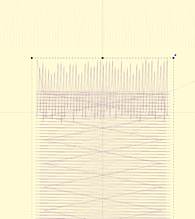
The density of the parallel and zigzag underlay is adjustable
for increased coverage. Sometimes it is better to have a higher density underlay
(0.8 – 1.2mm) and a lower density top stitch (0.8mm) so that the coverage is
solid, but the pull on the fabric is reduced, which helps with registration
issues (eliminating gaps between stitched areas).
The ‘Freestanding’ underlay creates a mesh under the satin,
similar to the freestanding background object type. This is useful when making
Richelieu bars or satin shapes that will be stitched on wash-away stabilizer.
When using the ‘Freestanding’ option, you do not need the other options, so you
can leave them off. The Length, Inset and Density properties do not apply to the
‘Freestanding’ option.
Foam (3D) Underlay (Level 2)
The ‘End 1’ and ‘End 2’ underlay properties control automatic
caps and joins for 3D foam embroidery. End 1 is defined on the outline as the
location of the closing point (red node).
Note: Because the density required to cut foam cleanly is so
high, avoid turning tightly, as those stitches can bunch up.

Automatic underlay shown, left-to-right: cap, join, a
letter.
Foam (3D) column style(Level 2)
The ‘Foam’ style automatically sets the underlay,
including end caps on both ends, sets compensation and increases the density so
that the 3D foam can be cut out by the needle.
Contour (Level 2)
Checking the ‘Contour’ button on a Satin Column will arrange
the stitches to run opposite to the inclinations, rather than parallel to them.
The density is maintained throughout the column, even if the column widens and
narrows, as the program will automatically adjust the number of rows as the
width changes. Contour 2 will provide more of a ‘fill’ effect as areas widen and
narrow, whereas Contour will have varied density across the shape as it
widens.
The Fringe stitch is a unique stitch that allows you to create
what some call “3D Embroidery” by cutting the bobbin threads under the satin,
which frees up one side of the stitching to come up and away from the
fabric.
This Fringe stitch lays a run down along the edge of the satin
first, and then places the satin over top with extra needle penetrations causing
the satin to anchor itself to the run. It finishes off with a top stitch run to
anchor it all together. This method allows you to have fringe effects in
embroidery without the need to anchor the stitching down with a fill, as has
always been the case.