
When you resize a regular stitch file, the density would normally get more or less dense, but Embrilliance will recalculate the stitches for you automatically.
That recalculation process is complex and difficult, so there are some settings you can adjust to achieve optimal results.
Use the Preferences button on the main toolbar to adjust the sizing settings.
The sensitivity slider is used to control how well the program discovers fills and satin stitches. If you have a design that has a lot of manually created stitch effects, then you may want the sensitivity higher, whereas normal designs that are digitized with objects like fills probably don’t need so much sensitivity, especially if there is blending going on.
• Gap Reduction is a function within the software that helps adjacent areas lessen gaps that might be exposed or widen during increases in size.
• The stitch length filters are used to prevent loopy stitches on the fabric from stitch elongation, and in the other direction, small stitches from gathering on the fabric making too many perforations or simply bunching up the fabric.
The settings are broken out by stitch type because the handling of satin stitches is special and you may want to achieve a split-satin look at a certain size.
Because letters added together are considered one object, you can’t selectively rearrange them in the object tree. Fortunately, there is easier method accomplished via Color Sort.
Use the ‘Color Sort’ choice on the Utility menu, which displays the following dialog window:
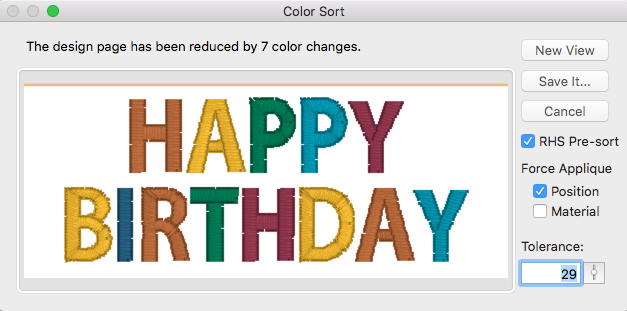
Notice our design has been reduced by 7 colors.
At the top of the window, you’ll see the result of the sort. Notice that color stops may be reduced (the basic reason for sorting) but you can also wind up with a sorted applique design that keeps the same number of stops. In that case you may see a message, “The design has been sorted but not reduced.” Read more about ‘Keep Color Stop’ below to understand this.
Click ‘New View’ to open a new design page with the sorted result. This is useful to check what you’re done before saving the design.
Click ‘Save It…’ to save the color sorted file as a stitch file. If you don’t change the name, the program will append “_sorted” to the end of the current file name. Your original working file (.BE file) is preserved and not changed.
There are some additional controls available for more precise handling of the design page during the sort process:
‘RHS Pre-Sort’ will process the Remove Hidden Stitches function before sorting. This is the same as if you hit the RHS ‘scissors’ button on the main toolbar. It is useful to do this sometimes, as those stitches being removed could have affected layering. By removing them, the chances of the layers moving together are greater.
‘Force Applique’ will make the applique Position and/or Material steps sort together regardless of layering issues. This is used on things like lettering designs where overlapping can occur, but you want to run all the positions or even add the materials to all the letters in one stop.
‘Tolerance’ controls how much overlap will be allowed in order to sort. While it’s not really a percentage, it is okay to think of it that way, and the value goes from 0-100. When you set it at 0 then you are saying, ‘Do not sort if the layers will change at all.’ Conversely, a value of 100 means, “Sort the colors together no matter what it looks like.’