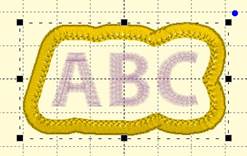
There are three basic steps in an applique, which essentially is how a patch is constructed. There is a position stitch, which runs showing the machine operator where the applique or patch fabric will need to be in the hoop. The Material stitching sews the applique in place, or replaces it using a fill. Then the final edge, that which makes the faux-overlock, is called the topstitch.
Selectively checking or unchecking the boxes for the stitch steps is used in situations where the patch is assembled in other orders, for instance, when the topstitch is desired to run as a final step after all the rest of the patch is complete. Then, there are actually two patch designs, identical to each other, with the earlier one doing all the non-topstitch work, and the final one doing only the topstitch work.
Cut When Complete
When stitching the patch directly onto yardage, the patch will need to be cut from the cloth once it is completely sewn. This process requires no applique steps, so they are removed from the automation of the patch edge.
Using Pre-Cut
A pre-cut applique is created either by hand or machine. Selecting this option ensures that the position step is made, but the material tackdown is run with the topstitch, saving a color stop.
Hand Cut in Hoop
This option ensures all color stops. The position stitch runs, then the user lays the fabric over it. This is followed by a tackdown stitch in a separate color. The machine then stops and the user carefully cuts the edge of the applique off, while the project is still hooped. Once the excess material is cut away, the topstitch is run, including the patch design itself.
Create Using Fill
When stabilizer is hooped without fabric and no applique is desired, this will create a fill similar to a freestanding lace fill. Normally, wash-away mesh stabilizer or vinyl backings are hooped, but there are others, such as light cut-away (if you are good at cutting it closely.) This method is a favorite when the exact color twill is unavailable, or a very few patches are being made.
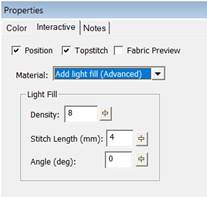
Add Light Fill
Sometimes the twill color is not exact for the desired result, or there may be an artistic reason for wanting to add texture and color to the background of the patch before the design is sewn. The light fill option adds that color and texture using a horizontal fill that will not affect the overall density of the patch in any noticeable way.
The Advanced version of this has additional properties for the user to control, however this is not normally adjusted. It is added here for those skilled digitizers who want to make slight adjustments to refine their patch.
Density, Stitch length and Angle are adjustable in the Light Fill (Advanced).
The Utility menu will have an added option when Merrowly is installed. Add Patch Edge will create patch shapes in three styles: Rectangle, Circle, Page Wrap.
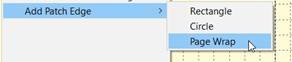
Three types of automatic patch creation
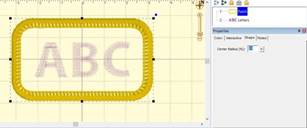
Rectangle, with curved-corner properties
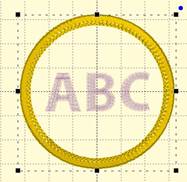
Circle which can be sized to form an oval.
Automated shape that wraps the design on the page.
Some patches come pre-made with lettering baselines. To use these, add a lettering design to the page, and be sure it is positioned after the patch design itself. The lettering will generate when you type in the text box, telling it what to say.