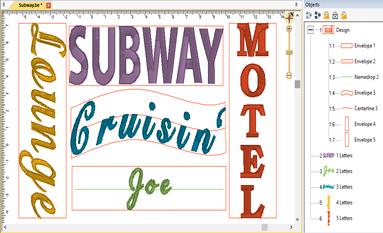
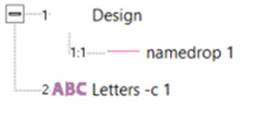
You can design templates for lettering to use in name drops, word walls, subway art, etc. Templates are interactions between two different elements: A lettering design, and a template object. To accommodate multiple template designs on a page, the template and lettering items are named using a numbering system that will match them together.
The lettering works with the built-in fonts or any .BX fonts. The templates work with lettering of a normal single-line style only. Template objects must be native objects from the Create Mode of the platform, and the stitch type must be Line, not Run or other stitch type. Template objects may be drawn if you have the tools, or if a .BE working file has template objects within it, you can use those.
There are three types of template objects: Namedrop, Envelope and Baseline. Use the object tree to name the shape with one of those names, followed by a number, ex: namedrop 1
To associate a lettering design with a template, add the matching number to its name, ex: letters 1
Once you have the names matching, use the letter properties to generate the letters – type or hit enter, or adjust one of the properties on the page to cause the lettering to regenerate. When the lettering generates, it looks up through the design layers (earlier in the design) for matching template objects. Once found, the template and the lettering work together.
The template object must be in a design that comes before the lettering design. When the lettering design gets updated, it only looks backward to see if there is a matching template for it to use.
Lettering used with templates has optional parameters, depending on the template object. You can add the parameter to the lettering name, ex: “letters –c 2”. This example will cause the lettering to use the template object with a number 2 at the end of its name (ex: “baseline 2”) and also will center the design.
You can place all your template objects in one design, which is customary. As long as that design comes before the lettering designs in the sequence, the template items will be found. You do not need to have the template objects in any order; the sequence of the lettering designs controls the sewing order. All that matters is that the index numbers in the names match.
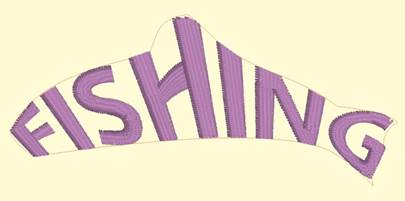
The simplest of the template forms is a namedrop. It is a simple 2-point line, running left to right, which controls where lettering will be placed.
Namedrops have the options: –c (center), -l (left), -r (right), -j (justify), -m (middle), -t (top). These options inform the template where on the line to place the lettering. The middle and top options refer to vertical placement.
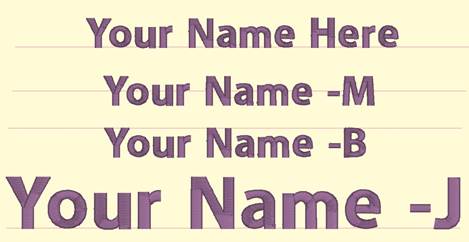
Namedrop shapes can be named using the options along with a number, ex: “namedrop –cm 1” will cause “letters 1” to be placed in the center horizontally and middle vertically. If the letter name specifies a different option, that will override the template name.
Once the lettering is linked with the template, most of the normal lettering handles still do all the regular operations such as move and rotate. The only difference is that the lettering will always stay on the template line.

If you have StitchArtist, information about drawing namedrops can be found in the ‘Drawing Lettering Templates’ section of this manual.
Envelopes can yield effects from simple placement to re-shaping of the lettering.
The options for envelopes are: –c (center), -l (left), -r (right), -m (middle), -t (top), -b (bottom).
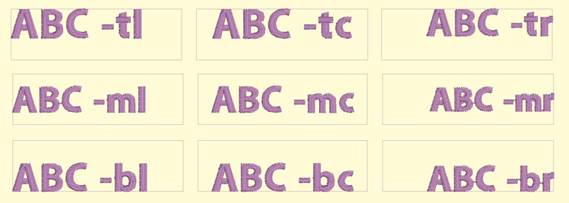
These options control placement of lettering within the template. If no options are specified, the template will stretch the lettering design to fill the envelope.
As with namedrop, envelope shapes can be named using the options along with a number, ex: “envelope –cm 1” will cause “letters 1” to be placed in the center horizontally and middle vertically. If the letter name specifies a different option, that will override the template name.
Envelopes have a unique ability: They allow editing as visually normal letters when selected. To see the lettering in the envelope, click off the letters (de-select them).
If you have StitchArtist, information about drawing envelopes can be found in the ‘Drawing Lettering Templates’ section of this manual.
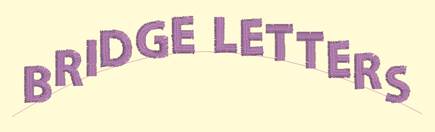
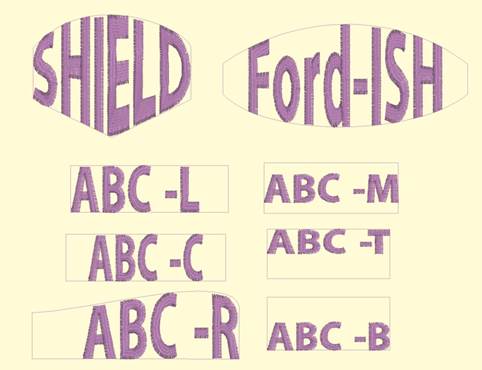
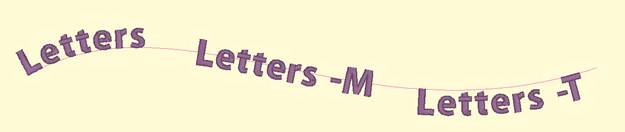
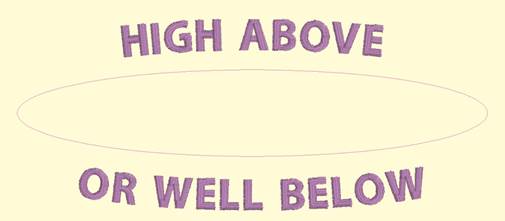
Baselines provide a means for lettering to follow on a path, whether open line or closed shape.

Lettering with baselines have the options: -m (middle), -t (top), -b (bottom), -c (center).
Note: The lettering design gets named with the option, not the baseline. Baseline names would be simply “baseline” followed by a number, ex: “baseline 1”.
There is an additional option for closed shape baselines: -l (lower) or –u (upper).
Baselines have pre-determined default settings which can be overridden by the lettering options. An open baseline will initially place the lettering at the left start of the shape. Closed shape baselines will place the lettering at the top, centered.
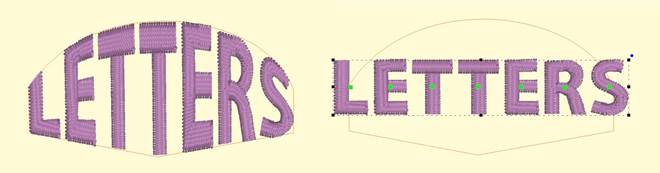
The control handles for lettering work slightly different on a baseline. The center handle, used to select a letter, also will allow the letter to be placed anywhere both vertically and horizontally on the baseline.
The lower pennant handle causes the lettering to move along the baseline, and to have all the letters to the right of it follow. The pennant handle above the center causes the letter to move above or below the baseline and all the letters following will do the same.
The rotation handle connected to the center handle causes the letter to rotate and all the following letters rotate in place to match.

The middle and top options describe how the lettering will be placed vertically along the baseline. Top indicates that the top of the lettering design will be placed along the baseline. Middle places the lettering design centered vertically on the baseline. Bottom is the default, so no option is required unless using the –l (lower) option.
When using a closed shape, such as a circle, it is often desired to place lettering both above the top and below the bottom of the circle. This can be accomplished with two lettering designs, one for the top, and one for the bottom. This allows each line of text to have its own settings, even a separate font. When specifying that the lettering will go to the bottom of the shape, and the –l (lower) parameter. The template will switch the default placement to –t for lower shape lettering. You can change this using –m or –b.
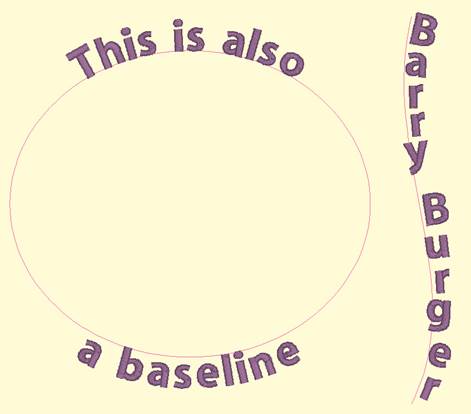
You can achieve any letter placement with a baseline. Even ‘wavy’ vertical text can be accomplished using a vertical line and rotating the letters using the center rotation handle.
If you have StitchArtist, information about drawing baselines can be found in the ‘Drawing Lettering Templates’ section of this manual.