Flatten
 When importing vector art from outside sources, it will be
unlikely that the shapes are truly ready for use in embroidery. Often times in
the creation of vector art it is expedient for the artist to layer one shape on
top of another. In graphic arts, only the final visible items will have any
impact on the result, so any shape or any part of a a shape may be hidden
without consequence. In embroidery, those shapes, as they exist, will be used.
This means there will be a tremendous amount of overlap. The Flatten command
clips the shapes against each other so that only one top layer remains. Remember
that registration issues will occur when you sew these objects, so you will
likely need to do some editing.
When importing vector art from outside sources, it will be
unlikely that the shapes are truly ready for use in embroidery. Often times in
the creation of vector art it is expedient for the artist to layer one shape on
top of another. In graphic arts, only the final visible items will have any
impact on the result, so any shape or any part of a a shape may be hidden
without consequence. In embroidery, those shapes, as they exist, will be used.
This means there will be a tremendous amount of overlap. The Flatten command
clips the shapes against each other so that only one top layer remains. Remember
that registration issues will occur when you sew these objects, so you will
likely need to do some editing.

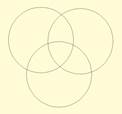
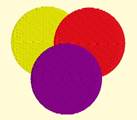
On the left is a graphic created
and saved as an SVG. The middle is the import of the SVG – notice the artist
used three circles to create the design, which seems reasonable enough. If we
make them all fills (and set colors, if needed) as we have on the right, it
looks okay…
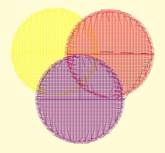
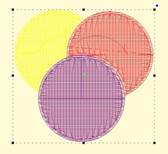
…But there is a problem. The design on the left is shown with
3D off so you can easily see the overlapping stitches. Once we use Flatten, as
in the design on the right, we are closer to having something that will sew
without damaging our needle or machine.
Inflating / Deflating shapes
 Sometimes you need a shape to increase or decrease in size, but be
exactly the same distance around all the lines of the original. This means the
new shape will have to change. A classic example of this is echo quilting,
where, as the lines of stitching echo out, the curves become less tight, and
fewer details are visible.
Sometimes you need a shape to increase or decrease in size, but be
exactly the same distance around all the lines of the original. This means the
new shape will have to change. A classic example of this is echo quilting,
where, as the lines of stitching echo out, the curves become less tight, and
fewer details are visible.
Clicking the Inflate button on the Tool Pane displays the
Inflate dialog, which allows you to inflate selected objects and their holes as
needed.
When inflating or deflating, the object selected will change.
Thus, if you wish to have the original shape retained on the page (for some
other part of the design) you should copy and paste it before inflating. See the
next section, ‘Automatic Outlining’ for an example use of inflation.
 Automatic outlining will create a shape that surrounds any stitches
on the design page. This is useful when creating stitches that will add to an
existing embroidery design that has been merged onto the page.
Automatic outlining will create a shape that surrounds any stitches
on the design page. This is useful when creating stitches that will add to an
existing embroidery design that has been merged onto the page.
Automatic outlining can also be used to create an object hole.
The purpose for this is for quilting designs. You can merge a design or create
an interior design with objects, then make a new outline in some larger shape,
for instance a quilt block, or your hoop. By adding a hole to that shape, in the
form of the current stitches on the page, you can create a stipple, or an echo
perhaps, that will surround those stitches and fill the block.
The automatic outlining can be combined with Inflation to
allow room around the stitches, for quilting or other purposes. For example,
there is a feature elsewhere in the platform that automatically creates
knockdown stitches for sewing on terry by first creating an automatic outline,
then inflating it slightly, and adding a light fill.
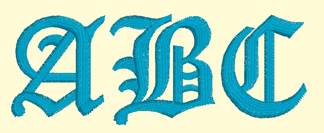
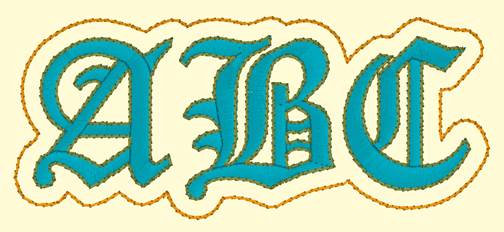
Here’s a quick illustration in use, starting with a basic
monogram:
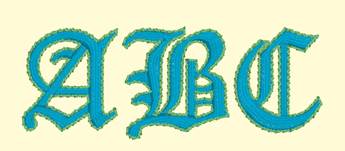
Now we will automatically outline it and set those new
objects to a backstitch, made green.
Let’s try a few more steps for
fun:
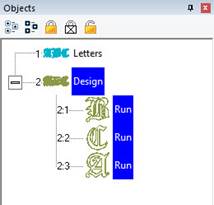
Copy the outlines that were created by
the Automatic Outline tool:
So you should see this.
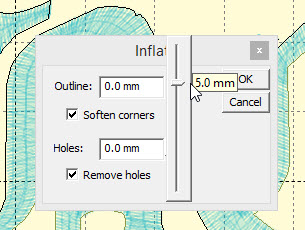
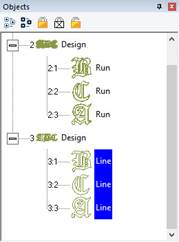
Use the Inflate button  to create echoed outlines of the
letters. Note the ‘Remove holes’ option is turned on. We are using a 5mm
inflation.
to create echoed outlines of the
letters. Note the ‘Remove holes’ option is turned on. We are using a 5mm
inflation.

Add a Union. Next, delete the
individual ‘Line’ objects, as we won’t need them anymore.
Select the Union and use the menu
‘Create->outline->delete holes.’
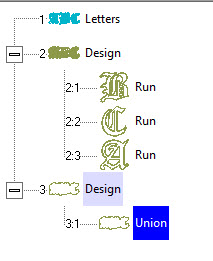
Now add a run to the Union, change
style, color, etc.
Publishing
When you want to create your own art and use them within other
designs, as motifs or embossing patterns, you can ‘Publish’ them in several
ways, including the creation of a .BX install-file which lets you share your
work with others.