
Density Repair Kit

Welcome to The Density Repair Kit (DRK), the most sophisticated density adjustment, analysis and repair tool available for the embroiderer!
DRK does the following:
• Removes hidden stitches from within a design so that it will sew thinner, cleaner, and with less thread (and needle) breakage.
• De-Clumps design areas. These are areas that are over-sewn repeatedly with the same color.
• Filters small stitches from your designs that would otherwise create thread build-ups and jam the machine.
• Reduce the density in designs that were shrunk to fit a hoop.
• Increase the density of designs for better coverage.
• View the density of designs to see how they’ll sew before expending time and thread on a trial.
• Limits the density of your designs based on the fabric and thread that you are using.
• Informs you of how best to embroider the project or fabric that you are working on. It recommends stabilization, hooping technique, needle type and size, and thread weight to help your project succeed.
• Saves you time and money. Reduced stitch counts save enormous amounts of time and thread usage. Proper density adjustments allow projects to complete successfully. With DRK, project time and thread savings of 15%-30% are common!
• Runs with or without Essentials, because it’s so cool, everyone ought to have it!
• Like all our products running in the Embrilliance Platform, you get OSX and Windows versions. Your license lets you run it on as many computers as you own — even mix and match Mac and Windows. No dongle required. No limits to the number of installs. And as you add products, just add the serial number to the program, and all the features are there in one program, easy to use.
Density Repair Kit is so unique it has four patents!
Why The Density Repair Kit?
Have you ever had a design come out bad? Of course, we all have. That’s why DRK was created. DRK cleans up embroidery designs that are too dense or poorly digitized for your project.
How? Like its name implies, DRK has a set of tools to adjust the density of embroidery designs. These tools help you embroider with greater ease. You can alter the density of any design, and make that design work on virtually any project or fabric type.
It does this by asking you what you are going to be sewing on, and then it analyzes the density of your embroidery design and adjusts it.
Now, you’re probably wondering if it takes an embroidery instructor camped out a week at your house to get you up and running. No, it doesn’t. You can have the program do everything automatically or you can control it manually. Running DRK is easy.
A Side Effect of DRK
By reducing the number of stitches that are in a design, DRK saves you an incredible amount of time. Even with today’s fast-stitching machines, 10,000 stitches is still around ten minutes. The thread savings, the number of bobbins saved, and the frustration of failed embroidery all add up! Imagine tackling a project and knowing that it will sew okay before you even start!
If you’re intrigued please read on.
The Density Map
The Density Map is a graphical display of the density, or stitches-per-inch in your designs. To see the Density Map, click the button on the main toolbar. This is useful to see if a design is not going to sew well. For instance, this is a design that has been accidentally overlapped outside of Essentials, thus its density is very high.
Like weather radar, the density map shows areas where trouble is likely:
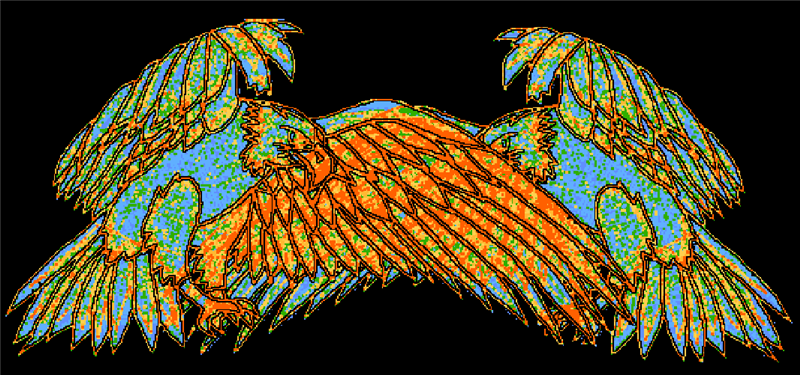
Where the design shows bright red in color, there are six layers or more of thread, which undoubtedly will produce poor embroidery results.
The Density Map can be used to illustrate when a design (probably from the internet) is dangerous to sew on a project without test sewing it first. And it also helps identify when you would want the Remove Hidden Stitches function or even the Sweep. Those features will remove stitches that are likely to cause poor design production, while maintaining the same visual design.
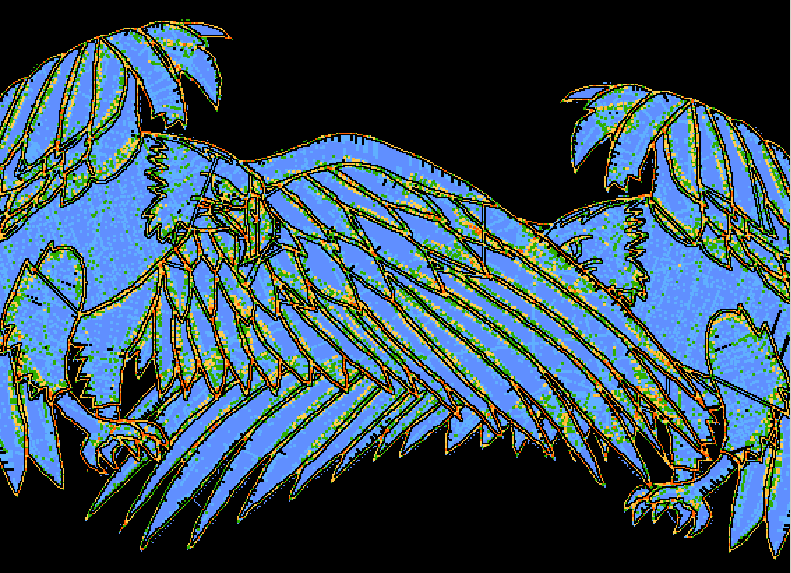
Of course, Density Repair Kit will automatically clean up your design! Here is the same design after a Sweep is performed:
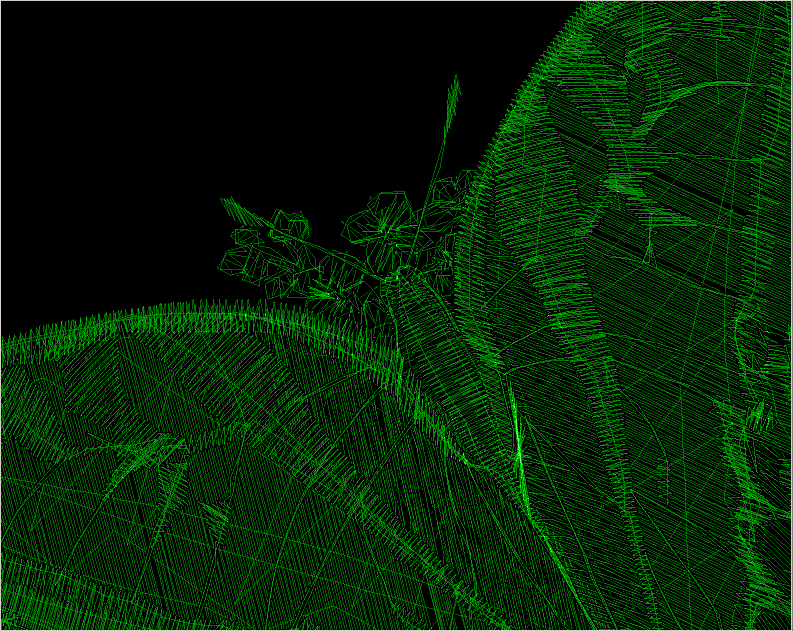
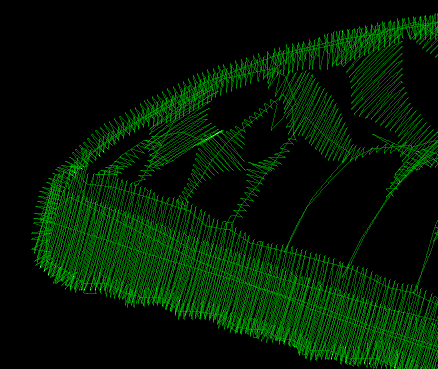
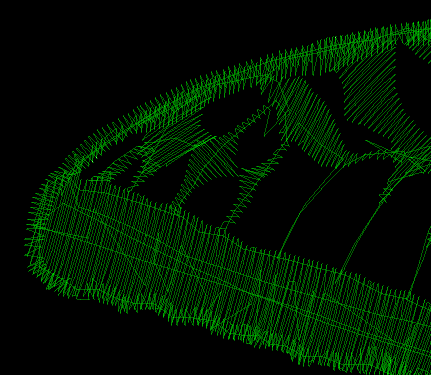
Wireline View
The WireLine Density Map is like a x-ray of your design, allowing you to see through the layers of stitching to analyze those underneath. It helps to see the relationship of padding stitches, as well as how a design has been compensated. You can view the whole design or individual colors to better see what’s going on inside your design. Zooming in the WireLine allows you to get up-close and personal with the stitches to see how they were digitized. When determining which colors to remove hidden stitches from, the Wire- Line Density map is your best analysis tool. And, in addition to all the above, it looks really cool.
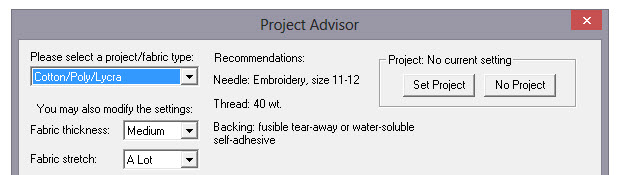
Stitch Properties
The DRK version of Embrilliance allows for more control of the stitches using our Project system. The Stitches property tab adds controls to use the project settings from the Project Advisor to remove stitching, De-Clump, and limit the density. This is the Project Advisor:

Density Tuning
DRK has a density tuning control that lets you adjust the stitch count of your file while keeping it the same size. As the program adjusts the stitches it will also keep the pattern fills intact.
By moving the density tuning control slide + or – 25% you can easily adjust the density.


Another use for the density tuning is to increase the coverage that a design gives. For instance, using puffy foam under an area of satin stitches in a design that wasn’t originally intended for it can now be accomplished by increasing the satin fill density for that color. Or if you are embroidering a towel, and want better coverage to keep the loops in the terry cloth from popping through, simply increase the Density Tuning slider.
Filters
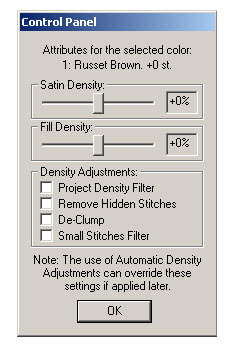
- Use Automatic Settings: makes use of the Project Advisor project to identify the fabric density, thickness, stretch and material being used. The needle penetrations are then adjusted accordingly.
- Limit Density: Certain combinations of fabric and stabilizer have limits on the number of stitches per square millimeter. More than that causes poor stitching or puckered fabric. Using the Project Advisor, the limiter will reduce the stitch counts in the affected regions.
- Remove Hidden Stitches (intra-design): Often a design has color layers that have some overlap for the purposes of registration. However, many times these regions are a result of auto-digitizing and poor results follow. The so-called, “Bulletproof Embroidery,” is an example. When stitching enters an area within a design that will be covered by a later color, those stitches can often be removed, and that is what this does.
- De-Clump: Within sewing a single color, areas sometimes get too many stitches overlapping in small groups. These areas form clumps of thread on the back of the fabric which can become entrapped in the needle plate. Sometimes this traps the embroidery in one place and cause loss of registration. De-Clump reduces these stitches.
Limit Density
Some designs are simply digitized too dense for certain projects. Other designs work well except for particular areas in the design that are too dense. When you select a fabric density and thread weight in the control group “Automatic Density Adjustments,” the Density Limiter creates a minimum-allowable density for your project. The Density Limiter will analyze each section of your design, looking for stitches that are too close together. It will then selectively adjust the density of those areas that need it. Only areas that are too dense for the project and/ or thread are affected. This filter is very helpful when you increase the thread weight. Fabric stabilization needs to be radically increased with heavy thread. By reducing the number of stitches, heavy threads can be better supported with less stabilization. Also, this filter will help preserve a clean look to your designs when working on loose fabric. Because the fibers in the fabric are farther apart, stitches will tend to clump in one needle-hole, rather than fanning out evenly. This gives a ‘pinched’ look to the edges of the embroidery. If your design is too dense for some fabrics, your needle can actually cut the fabric, leaving you with a hole and a patch instead of embroidery.
Remove Hidden Stitches
Now you can combine designs and have them overlap! In the past you could not do this because the area where they overlap would have too many stitches. This tool can automatically find those overlapped areas and cut out the stitching underneath so that the design can sew flat!
Say an area of color has another color sewn in the middle of it. Remove Hidden Stitches will ‘flatten’ the area under the second color by converting the hidden area to a satin fill. This makes it less difficult for the needle to penetrate the fabric as the top color is sewn.
In some designs more than one color is used to create padding stitches for the entire design. In this case you will want to turn the “Keep Padding Stitches” feature on in the Preferences Window. These stitches are technically hidden and will be removed otherwise.
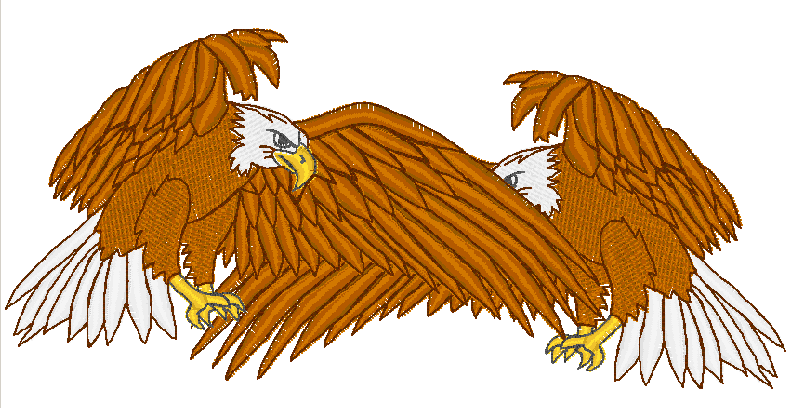
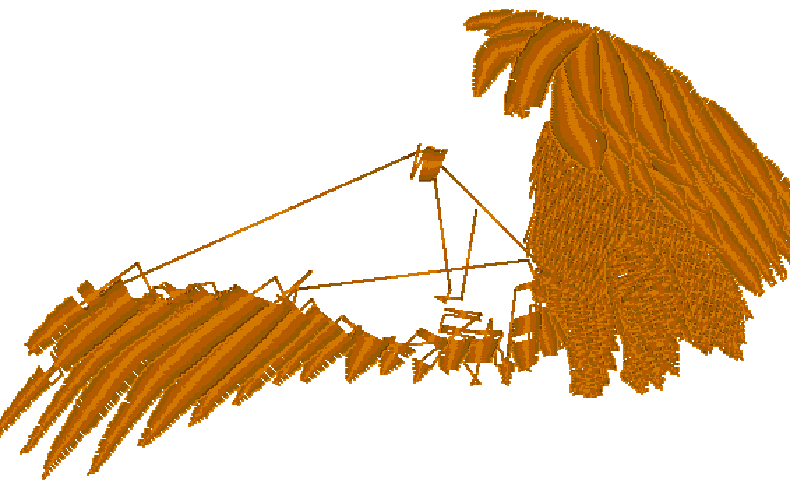
Maybe you want to do this. But the first eagle’s wing is a problem:

The under wing needs to be removed. Select Remove Hidden Stitches to remove the under wing of the eagle:
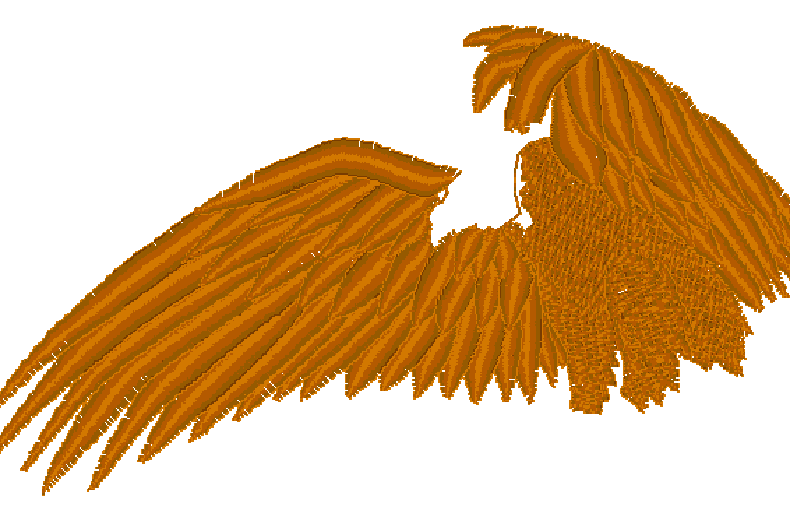
Your design is ready to sew. (And it will!)
Note: This is different from removing hidden stitches created by overlapping separate designs, such as in a composition. This filter works within a single design.
De-Clump
This is a variation on the Remove Hidden Stitches filter. De-Clump will analyze a color and remove stitches that are hidden within that single color.
When a color sews repeatedly over itself, it can create a thread build-up that prevents the design from sewing nicely. Too much thread will distort a design, causing the fabric to ripple around the edge of the design. De-Clump helps to thin the design by reducing the number of thread layers.
We’re certain that you’ve watched a design sew in-place a dangerously long time. If you’re like us, you hate watching it because you just know it’s going to jam up. De- Clumping takes the worry out.
Another benefit from De-Clumping is that you can get rid of excessive padding stitches from poorly digitized designs, as well as those annoying sections where a design sews over itself.
The Sweep
The Sweep function, which is run from the button with the vacuum on it, will remove hidden and nested stitches within designs, as well as removing hidden stitches where colors are overlapped. It will also limit the density in design areas.
Note that the Sweep is different from the process that removes stitches from overlapping designs. The Sweep operates within a single design, whereas overlapped designs are ones that are merged in separately and then laid on top of each other. The processes are similar, but different in that way. Another difference is that the Sweep filters are not temporary; they are re-run on the designs as they are adjusted (for instance by sizing.)
Occasionally one of the sweep filters will leave an undesirable result, which is visually evident. As a rule, these filters do a great job, and if the design looks good on the screen, it will sew nicely. However, if you see something onscreen that you don’t like, you can prevent the Sweep from running on individual colors using the Stitch Properties tab.
Project Setting
When you have chosen a project, the program lets you set that project on the design page so that the Stitch Perfect filters can use it.
The Project system stores information such as Fabric, density, stretch and stabilizer to help the filters for stitch files minimize the pucker and gather that occurs when designs are used on lighter fabrics than for which they were digitized.
Once you repair one single design with DRK, and that saves you from a disastrous result, we think you’ll be amazed and happy and dance.