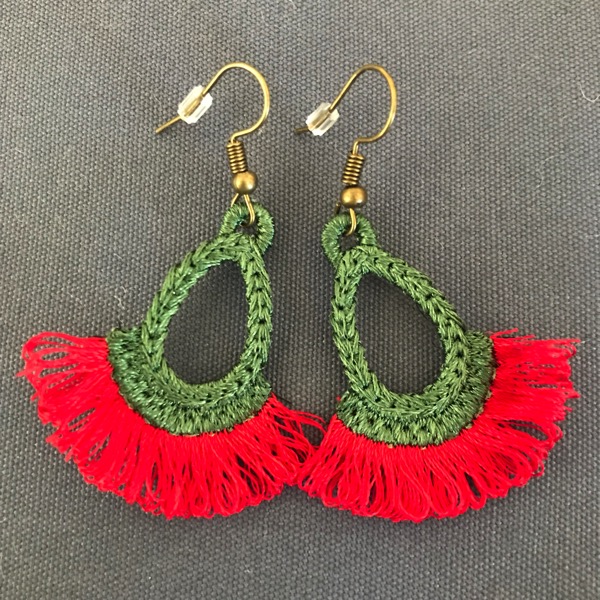
Here is a quick stitching fun design that can match any outfit! From Thanksgiving to Christmas to Valentine’s, St Patrick’s Day, Patriotic – you get the idea – simply switch up the thread colors and BOOM, matching fringe earrings!

If you have never stitched Free Standing Lace or a fringe style embroidery design, you may be wondering “how do I do this?” So we created a pictorial step by step. First, let’s give you the information on how to get this design!
This design is provided in our native .BE format, enabling you to save a stitch file for any embroidery machine. If you aren’t already an Embrilliance owner, we provide a free method to use our software called Express Mode that will not only allow you to use any of the wonderful free designs found in our project blog, but also enables you to install and create basic text treatments with fonts distributed in our popular .BX format produced by many embroidery design creators.
To learn more about Embrilliance Express and for the instructions and links you need to download, install, and use our software with our free project files, please click here.
Once you have downloaded the file, you will want to unzip it and open the BE file into your Embrilliance software. To save to your machine format, it is as simple as going to File > Save Stitch File As and choosing your USB location AND your machine file format from the format pulldown menu. If you want to see this feature in action, check out our step by step video.

We recommend that you use the smallest hoop possible. This is a great way to use your scraps of fibrous water soluble stabilizer! We used a single layer of water soluble stabilizer (WSS) and did not color sort the design. Sometimes the fringe can pull and distort the WSS and you really want the earrings to not lose registration.

Remove the item from the hoop after stitching is complete. Trim the WSS close to the design and rehoop another scrap so you can start the machine again – stitching these in many colors is addictive 🙂

Turn the embroidery over and you will see the bobbin thread. We used black bobbin thread, so that you could see the backside clearly. We will cut the bobbin threads away from the red fringe, so there’s no worry about their visibility.
Boutique Tip: Use the same color bobbin thread as the top thread in the loop. The matching color makes the bobbin thread almost invisible on the back side!

Use small sharp scissors to clip all the bobbin threads on the backside behind the red fringe. We used a Kai Serger Seam Ripper to slide under the bobbin threads and slice through them.

Clear away all the bobbin threads and CAREFULLY trim close at the connection point at the top of the fringe.

Trim away excess WSS and rinse under warm water! Ensure that they are flat as they dry and reshape as needed. Once they are dry, you can trim the tails on the backside – careful not to clip the knots! Add your french wire earring findings and BOOM you are done!
Have fun using different threads! We can’t wait to finish the ones we just stitched with variegated thread!