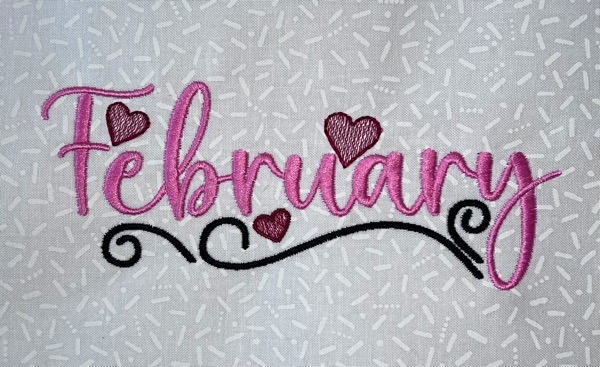
Continuing the Monthly Free Design Series with art from Sanqunetti Designs, our friend Lisa created a ‘February’ design for you to download! This time, the name of the month is adorned with light density, quick stitching hearts to make a fast, fun, and flirty February design!

Finding the perfect small designs like these sketch-style hearts can be a challenge; luckily, Embrilliance Essentials makes it easy to copy them from an existing design and use them to customize any project. It’s even easier to borrow elements from the designs we give away via the Embrilliance project blog, because we give you complete access to all the digitized elements by offering the native .BE working file format created in Embrilliance StitchArtist! This means easy selection, separation, resizing, and more!

Getting into the Group
You may have tried “clicking” on an element in a native .BE design, like the heart in our February offering, and found that you selected more than the piece you intended. This happens because the design elements you’ve selected have been “grouped” by the digitizer. This is done to ensure that one doesn’t accidentally move, delete, or alter one piece of a design on it’s own, safeguarding against accidental shifting or loss of a critical item. This grouping feature saves you headaches by allowing you to move all the critical elements of a design at once easily without having to make sure they are all selected. This is especially helpful when composing an embroidery with more than one design or when adding a lettering element to a design.

Ungrouping vs. Object Pane
If you’d like to select just one element from a group in a native design, you can choose to select the group and then use the Ungroup command in the Edit menu to break the group apart. This will make the individual elements selectable. That said, you will then lose that protective grouping should you need to (or accidentally manage to) save changes in the ‘donor’ design. There is another option that doesn’t remove the original grouping, however, Expanding the Object Pane in the upper right of the design window will show all the objects in the design and allow you to click the object in the object list to select it without the others in the group. You can even select multiple objects in the Object Pane; simply hold the Shift key while selecting contiguous objects (objects that follow each other in the list) or the CTRL key while selecting multiple objects that do not follow each other. In the example above, we wanted to select both the sketch heart and its outline. Once an item or items are selected, you can move them around the hoop, resize, or delete it from the original design, or copy them to the clipboard so that we can paste them in another design window. In our case, we’ll use the elements we copied to create a new coordinating design!

Pasting for Future Projects
With your ‘borrowed’ elements copied, click the New Design page button. With the new page created, we can click on the Paste button or press Control+V and voila! The design elements copied from the original design are pasted into this new design page! We can now save our new design with its own unique filename and start creating. This new design is ready to use like any other for future customization projects.

For example, we took the heart from the February design and did a bit of creative customizing to create a split frame design.
Being able to take out parts of existing designs increases the size and utility of your design stash exponentially! Think about all the “mini elements” you might find as part of designs in your stash. The customizing opportunities will multiply!
For more information, check out this video from our Embrilliance YouTube channel that shows how the Group and Ungroup commands work.
Note: Selecting & Sourcing from Stitch Files
Selecting something in a machine formatted stitch file shows something similar that seems like grouping. In stitch files, you’ll find that each color change, no matter how many elements are in that color, is rendered as a single object. This is not grouping, but a function of how stitch files work. Stitch files don’t contain the original objects and settings from the digitized file; rather, they only contain coordinates for moving the needle and simple instructions for when the machine needs to stop for you to thread in a new color or switch to another color on a multineedle machine. This means, the only place a new ‘object’ starts in a stitch file is at the beginning of each color. Using the Ungroup command, therefore, will not separate objects inside a stitch file. To separate an item from the rest of its neighbors in the same color on stitch files, you’ll either need to navigate to the stitch where the item starts and ends to insert a color stop using the Stitch Simulator in Embrilliance Essentials, or use the stitch editing and selection tools from Embrilliance Enthusiast to manually select the stitches you want to borrow and copy them out of the color block. For more information on inserting color stops, check out our Holiday in July post that makes excellent use of the technique.
The above design is provided in our native .BE format, enabling you to save a stitch file for any embroidery machine. If you aren’t already an Embrilliance owner, we provide a free method to use our software called Express Mode that will not only allow you to use any of the wonderful free designs found in our project blog, but also enables you to install and create basic text treatments with fonts distributed in our popular .BX format produced by many embroidery design creators.