
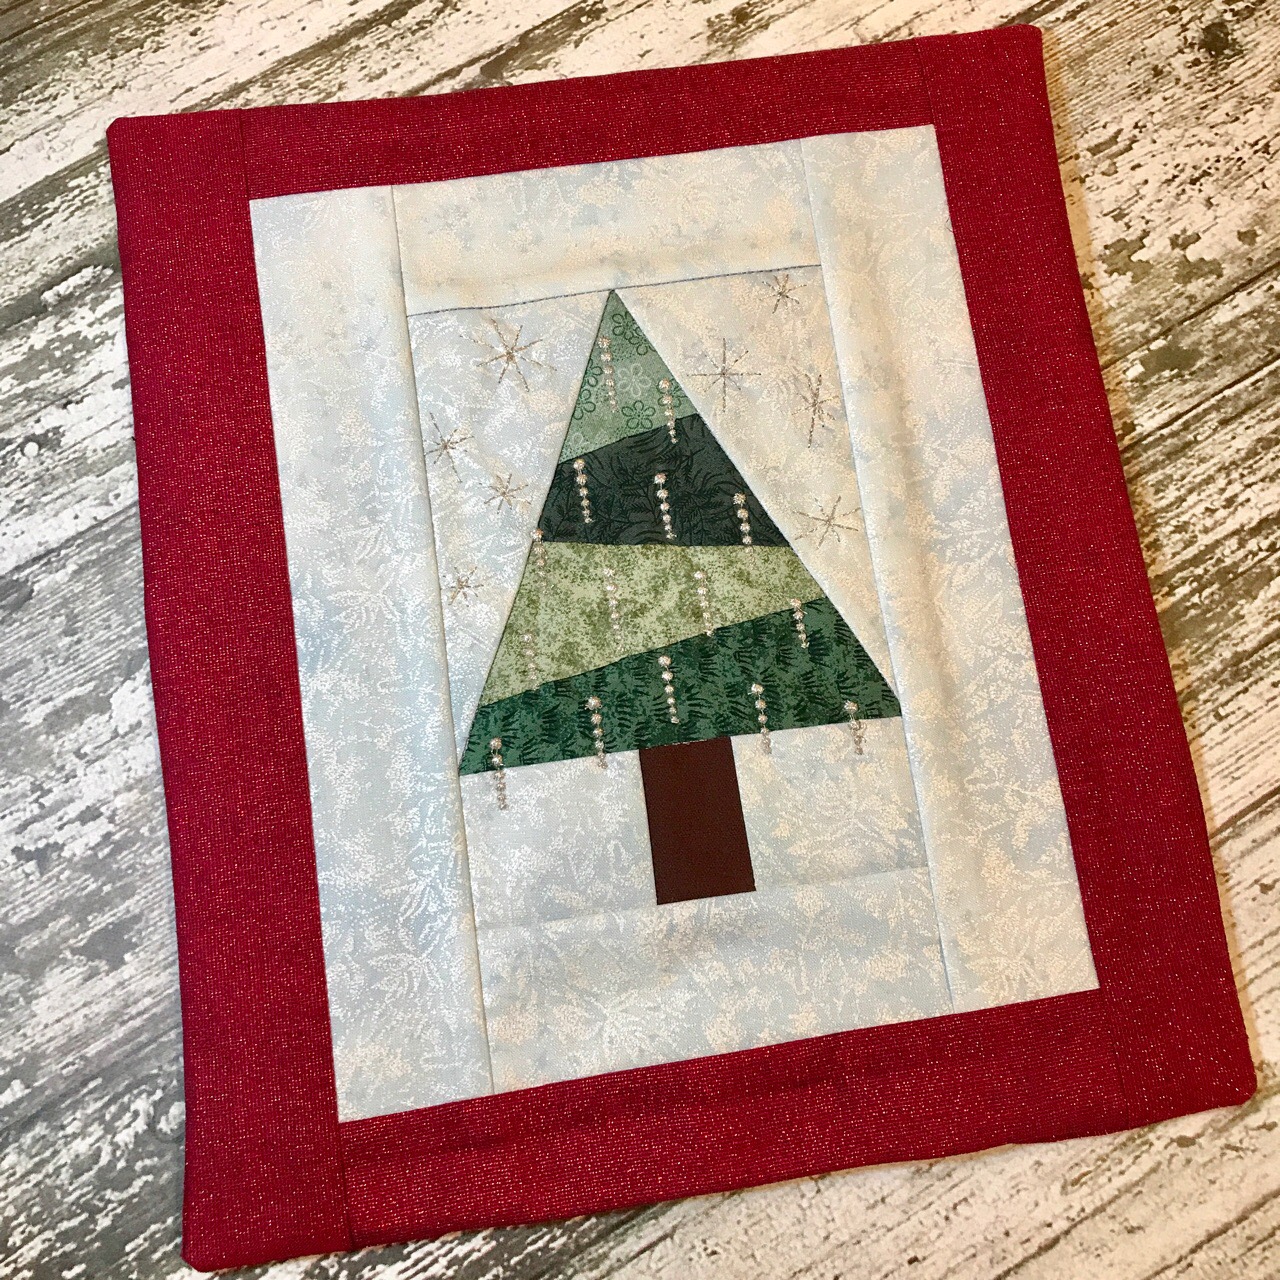

Did you know that you can use your embroidery machine to stitch out designs that look like they were pieced by a quilter? The type of piecing is sometimes called paper piecing, foundation piecing, or even “stitch and flip” sewing. In one of her Facebook AfterHours sessions, our friend Lisa Shaw walked her audience through the process of digitizing a paper piecing styled design using Embrilliance StitchArtist. What makes her beautiful results even more incredible is that you can create these types of designs easily even in our entry-level stitch creation software, StitchArtist Level 1. In the following post, we’ll cover the basic steps, but the project files available in the download below contain more complete instructions as well as the free Paper Pieced Holiday Tree design for you to try!
If you’d like to watch Lisa through the process, we recommend you visit her SewBubbles Facebook page to watch the recorded AfterHours session. If you are new to this process, you can pause, fast forward, rewind, and replay as needed to see how it’s done.
Start with a Plan


One of the first steps to digitizing any design is to develop a plan. You need to think through the way the design will stitch on your machine, envisioning the steps in your project in sequence. Stitching elements in the correct order is particularly important to this ‘paper piecing’ design, as each subsequent piece builds in layers to create the final image. Though the best teacher for learning this technique is your experience at the machine, it can be helpful to see how the pieces in a paper pieced design layer. This is why Lisa created the sequence below, walking you through her plan using step-by-step photos taken at the machine.
Guiding Lines

Lisa started her design with an outline of the general shapes in the tree, stitching them on hooped stabilizer. You can use wash-away stabilizer, tearaway, polymesh, even hooped muslin or batting! This technique is like starting with printed pieced patterns on a paper or muslin foundation. The lines provide a guide for placement, how much fabric is needed to cover an area, and the general placement of future lines of stitching. In this piece, Lisa used cutaway stabilizer and black thread to make the guidelines more visible. Remember, with any quilting project, you will want to use the a neutral colored thread; it will not show as all of the construction stitching is enclosed in the seams.
Putting the Pieces Together
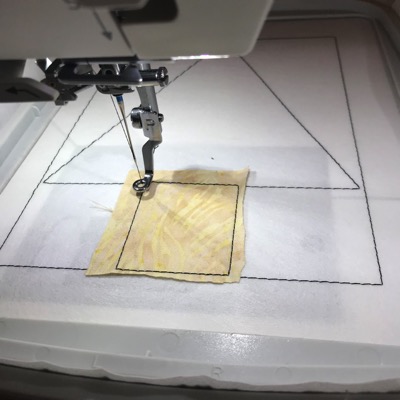
Now we are ready to start the “piecing” onto the foundation. Based on our numbered plan, the trunk needs to be attached to the stabilizer first. Place the trunk scrap so that it entirely covers the area shown in the original outline, then stitch the attachment lines. You can trim away any excess fabric, but remember that in many traditional quilting projects require a 1/4″ seam allowance in these pieces. You don’t want to trim too closely to the stitched edge.
Flipping Out

With the trunk in place, she now needed to add the the white background area to the left of the trunk. She placed the white scrap, right side down covering the stitched line on the left of the trunk that marks the fold line in the background piece. As this piece will fold back over, it must have enough fabric to cover the background area laying to the right of this fold line.
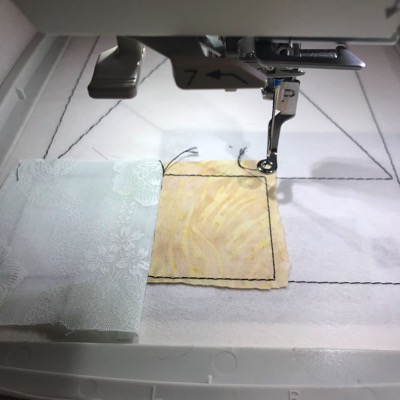
With the piece in place, she stitched the construction seam, allowing her to “flip and press” the fabric to form the block. This sequence of placing the fabric, stitching a line, and folding the piece back into place is the sequence that repeats for the rest of the project.

She constructed the rest of the tree in the same way; each shape is placed, stitched, folded over the construction stitch line, and pressed, carefully following the order in her plan.
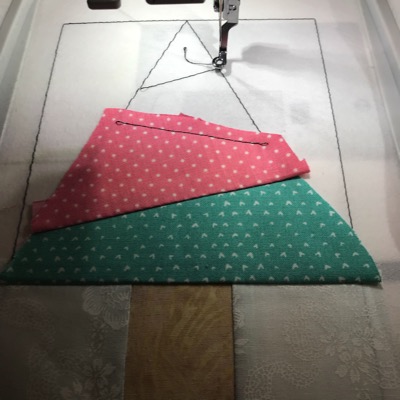
When working with odd shapes, it can help to create a guideline for the next piece’s construction line that runs at the same time as the one stitching down your current piece. This makes aligning and using smaller scraps easy.
Finishing Touches

With the addition of the top and bottom outer frame pieces, Lisa added the final ‘log cabin’ frame pieces on both sides on a standard sewing machine. She elected to add these final pieces manually to use the most area possible in the hoop to create her design block. Luckily, the straight stitch lines needed to finish the frames are easily achieved.
You can create blocks that stitch entirely in the hoop, just remember that you’ll have to limit the size of your block to fit the longest seams inside your sewing area.
For further instruction on how to finish, see the PDF in the project file download and/or watch Lisa’s Afterhours video on this design.
In the above zipped file, we included the two tree graphics, a PDF with StitchArtist digitizing instructions and the finished embroidery design. The designs are provided in our native .BE format, enabling you to save a stitch file for any embroidery machine. If you aren’t already an Embrilliance owner, we provide a free method to use our software called Express Mode that will not only allow you to use any of the wonderful free designs found in our project blog, but also enables you to install and create basic text treatments with fonts distributed in our popular .BX format produced by many embroidery design creators.
To learn more about Embrilliance Express and for the instructions and links you need to download, install, and use the Embrilliance Platform’s Express mode with our free project files, please click here.