
Great ideas abound when embroiderers gather, and that’s something we can all be thankful for! Ideas were flowing when our friend Lisa Shaw recently taught Essentials to a wonderful group in Phoenix, Arizona. One attendee asked about creating stylized, layered lettering designs, giving Lisa a great topic for her next live Afterhours session: How to digitize a ‘knocked out’ Layered Lettering Design. In the following post, you can learn more about how this awesome design came together or just scroll down to grab the free download & stitch the design for yourself!

Essential Editing
The discussion in Lisa’s class started with simple editing. If your primary concern is simply removing bulky layers of stitching, the Remove Hidden Stitches setting in Essentials will remove overlapping areas when you create 2 lettering objects and layer them as shown in the image below. Though Remove Hidden Stitches is incredibly useful for layering more than one design, we have to remember that RHS only removes stitches in a design or lettering element completely covered by stitches in a design or lettering element above it. It doesn’t create clear space around or ‘knock out’ elements in that bottom layer.

Making the Cut
This lead the class to discuss how they might manually remove sections out of that lower layer of lettering. You can use the stitch editing lasso of Enthusiast to select and delete stitches, certainly. You can even insert color stops using the Stitch Simulator in Essentials, recoloring a small segment of each covered stroke in the underlying letters so that it can be easily deleted. In fact, these are great skills to practice if you ever want to ‘break up’ an existing purchased design and alter elements of the design. In fact, If you have Enthusiast and want to better understand how “breaking designs” works in stitch editing, this video from our channel details how such alterations can create striped text as seen in the image below.

As wonderful as it is to have these options, the best results for layered, cut-out text will come from digitizing the layers specifically to leave space for the upper lettering. Stitch editing can’t re-digitize the elements so that they stitch out in a different order, nor does it fix gaps or broken sequences in underlay and travel stitches. As Lisa has often taught in her digitizing sessions, if we don’t want stitches to appear in a design, the best way to make that happen is not to fill those areas with stitches in the first place.
Diving into Digitizing

With a better understanding of the possibilities of each software package, the discussion now moved to digitizing these background “knocked out” letters. Though you can digitize letters like these in any level of StitchArtist, StitchArtist Level 2 gives you the most complete control of satin-stitch columns.
Once Lisa decided to create the layers from scratch, she realized the additional shaping and conversion tools of StitchArtist L3 were a natural choice for the task. Starting from imported outlines, Lisa used SA3‘s break lines as well as node editing and other StitchArtist tools to create lettering elements while leaving adequate space for the script text to follow. If you’d like to follow along with her process, check out Lisa’s great how-to digitize broadcast on Afterhours with Lisa here.

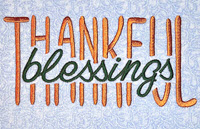
For those that want to stitch out this design for the upcoming season, Lisa created this version using StitchArtist Level 3 and PatchArtist‘s lovely PA Maggie script font. Watching the design run will also let you see how she ordered the elements to make them stitch efficiently at the machine.
The design is provided in our native .BE format, enabling you to save a stitch file for any embroidery machine. If you aren’t already an Embrilliance owner, we provide a free method to use our software called Express Mode that will not only allow you to use any of the wonderful free designs found in our project blog, but also enables you to install and create basic text treatments with fonts distributed in our popular .BX format produced by many embroidery design creators.