

Whether heading out for vacation or sending your young ones back to class, personalizing a bag with one of these simple monogram luggage tags is a great way to make sure everything gets there and back again. Our own Lisa Shaw brilliantly lays out the tools and techniques needed to create your own single-letter monogram luggage tag with StitchArtist in her latest step-by-step digitizing tutorial video.
Watch and Learn
In this video, Lisa walks you through her digitizing process from planning to execution so that you can create your own tag following her excellent example. She’ll help you recognize the way that the design needs to be built. By exploring the method for stitching this tag in the hoop, including all the information to create this piece with either marine vinyl or cork, she lays out key information that makes the digitizing process easier to understand.
Knot-reducing Knowledge
Many embroiderers taking on a vinyl or cork project find a knotted mess behind the starting point of their finishing stitches. You can keep this nest of thread from forming, should you be stitching on a single-needle home embroidery machine by turning the hand-wheel so as to pull the bobbin thread up to the top of your vinyl or cork. Unfortunately, this helpful only when creating a single tab in the hoop at a time. When stitching multiple tabs in the same hoop at once, you won’t have the chance to manually adjust with the hand-wheel. It can help the look, however to move your start and stop points of the finishing stitch to less conspicuous locations, hiding any egregious knots. Tucking them in next to the grommet or on the back side of the folded snap/rivet tab can make any small tangles all but disappear, just move the red ending ‘bowtie’ in your border into a location where the knot will fall near the area where the edge of your compressed grommet will land as shown below.

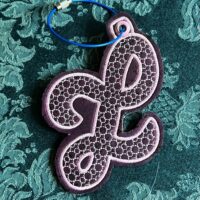
The style of luggage tag Lisa digitized is made specifically for marine vinyl or cork with an added “tab” for the placement of a grommet. If you’d like to use snaps or a rivet to create your hanging point with a strap of material – make the “loop” or “tab” at the top of the design long enough to create a useful loop when snapped together.

Making the Most of Motif Fills
The other immensely useful technique Lisa will teach you in her video the use of motif fills in StitchArtist. With over 200 motifs built into the program as well as an additional free collection you can download that containing everything you need to copy Lisa’s lovely ‘bubble’ texture, you’ll be glad you know the ins and outs of covering areas with motifs. If you love those bubbles, head over to the Embrilliance project blog and grab that free motif collection from one of Lisa’s earlier projects, the free ‘Happy Holidays Card and Coaster’!
All in all, we think every StitchArtist owner will love Lisa’s video. After all, what’s better than having a knowledgeable guide on your journey, even if it’s just the journey from idea to embroidery!