
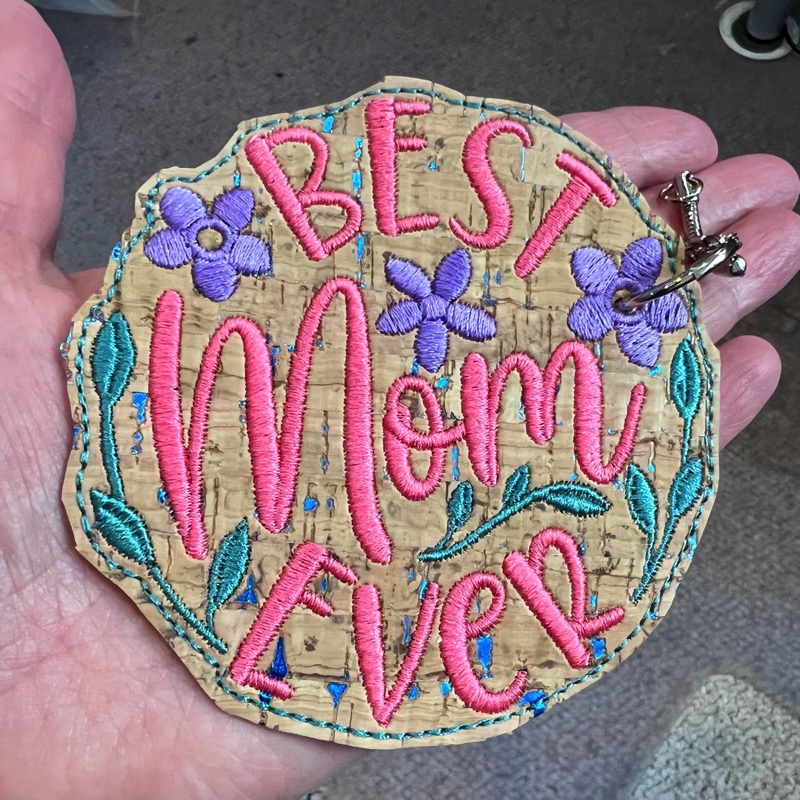
There is something especially satisfying about a quick project that looks polished, thoughtful, and stitched with love. This this Best Mom Ever in-the-hoop bag tag checks all the boxes. Created by our friend Lisa Shaw using StitchArtist, this design is a great example of efficient and clean in-the-hoop construction. What’s even better, is that it stitches quickly on either cork or marine vinyl, making it perfect for those “Wait… Mother’s Day is HOW soon?” moments.

This project fits in a standard 4″ x 4″ hoop while maximizing the available embroidery space for a bold and cheerful result. With bright satin-stitched lettering, playful flowers, and lovely decorative stitch treatments, this fun little project feels much bigger than its small hoop size.
Planning Matters for In-the-Hoop Projects
One of the biggest keys to successful in-the-hoop projects is careful planning of the stitching order. Unlike regular embroidery designs, ITH (In-the-hoop) projects often require the placement of additional fabric and backing pieces, turning, or alterations for additional hardware that need to happen at specific moments during stitching.
That is where the the features of the Embrilliance .BE working file can become a serious superpower.
The Power of Proper Names
Unlike most stitch files which simply contain color stops in order, inside a .BE working file, you can rename color steps and objects so that your process becomes an easy-to-understand part of your permanent project notes.
Instead of the aforementioned generically-titled color stops, your file can literally remind you what needs to happen next. By naming each step for it’s place in the process and what needs to happen at each stage, you can easily understand how every step at the machine comes together to build your final project.
Each sub-design or object can take on a title based on the job it needs to do in the design or instructions on the task you need to do at each stage. Names like:
- Placement or tack-down
- Stitch design
- ‘Slide backing under hoop’
- Hardware placement
- Final border stitching
These can all be written directly into the Object Pane by renaming designs and objects.

That means when you revisit the design a year later, you are not left staring at the screen wondering:
“Why on earth did Past Me do this?”
Past You already left instructions. This is for smart embroidery gremlins only. 🤓
How to Rename Objects in Embrilliance
Though this design already has its steps clearly named, you can rename objects in this design or others that you save in the .BE format with ease. Follow these simple steps to rename any object:
- Click the name of the object you want to rename in the Objects pane at the right of the design page.
- Click the name again to select and make the text editable
- Type the new name and/or make edits as you would to any text
- Press the ‘Enter’ key or click on an area away from the name to finalize your changes.

A Clever Use of Space
When working in a 4×4 hoop, every millimeter matters. Lisa’s goal with this design was to make it feel as large and impactful as possible while still leaving room for the bag tag hardware.
Her solution? Make the center of the decorative flower into the perfect location for a handy stitched eyelet.
Rather than adding extra hardware space outside the design, the eyelet became part of the artwork itself. Now, this flower is functional and cute. That is a solid embroidery win!

After the main design finishes stitching, you slide backing fabric underneath the hoop with the right side facing down to cover the back side of the bag tag.
After that, a decorative bean stitch secures the backing in place, and then the satin flower border stitches through both layers of material, creating a reinforced opening for the hardware.
Once removed from the hoop, the excess material is trimmed away and a standard hole punch can be used to open the center of the flower eyelet cleanly before inserting the clasp or hardware.
Materials That Work Beautifully
This design stitches wonderfully on:
- Cork fabric
- Marine vinyl
- Faux leather
- Other non-fraying materials
Because these materials do not fray easily, finishing the edges becomes quick and clean. The decorative outer bean stitch adds a handcrafted touch while helping secure everything neatly together.

BONUS: We’ve also included a Best Mum Ever version in the zipped BE file below!
The design is provided in our native .BE format, enabling you to save a stitch file for any embroidery machine. If you aren’t already an Embrilliance owner, we provide a free method to use our software called Express Mode. It will not only allow you to use any of the wonderful free designs found in our project blog, but also lets you install and create basic text treatments with fonts distributed in our popular .BX format produced by many embroidery design creators.