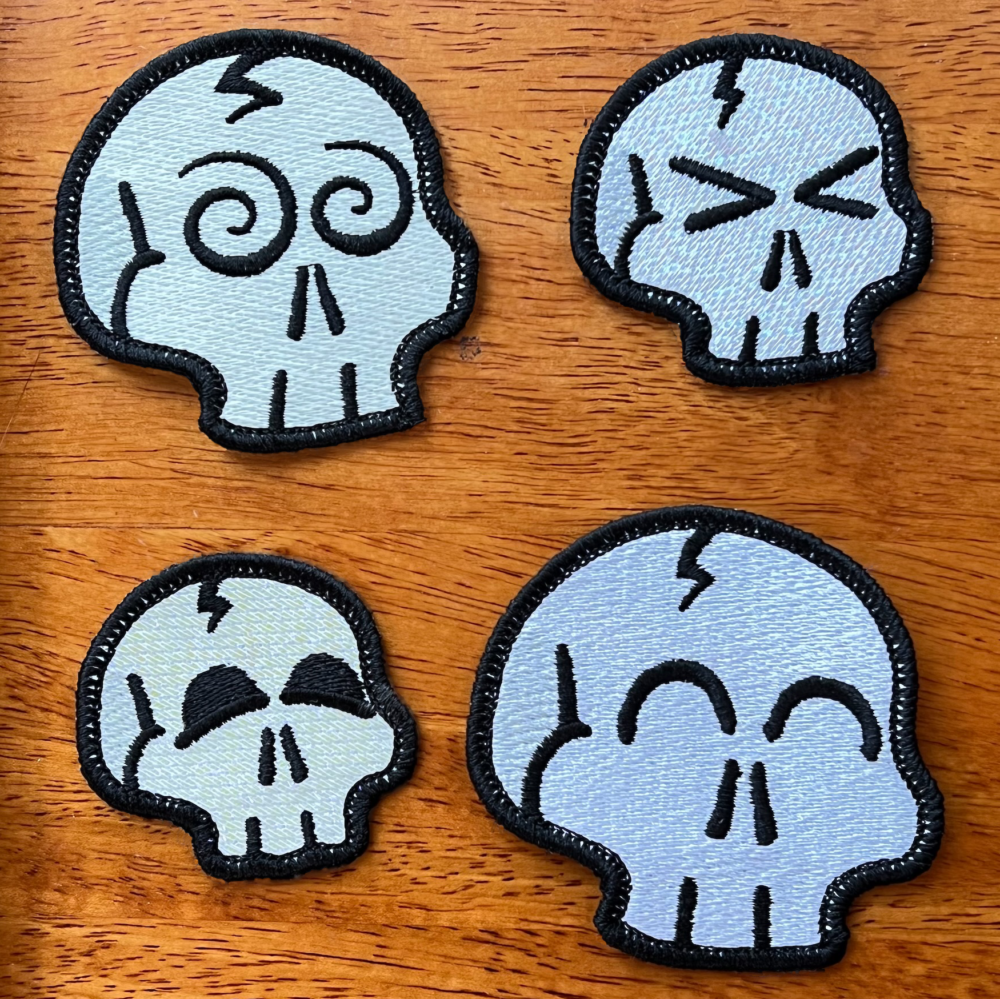
Spooky Season is already showing up in the shops and for many of our awesome Embrilliance users, the itch to stitch some fun and freaky designs has taken over. With Halloween upon us and our embroidery friends looking for something simple and cute on the spooky theme, our Erich Campbell created a couple original designs he thought they might ‘dig‘. Read on for more info and to download the design library below!

Working toward a kid-friendly concept, Erich combined the idea of scary skulls with friendly, expressive emoji to make a small set of what he called ‘Skullies’ – fun, interchangeable, and easy to alter icon-styled skulls with cute eyes that show some character. Rather than work from stock designs, Erich drew these little skulls himself. Here’s what he had to say about the library:
Need more Halloween designs to decorate your haunt? See more spooky project posts here!
“I didn’t want to lean on the same clip-art designs I see everywhere, so I grabbed the nearest notebook and a brush marker, searched up a page of reference images and started sketching some basic shapes. It was fun explaining why I was staring at a screen full of skulls when my wife came to see what I was working on, but I think she expects me to be a little odd by now.”

“For something simple like these, a little sketching was enough to give me something I could work from. I snapped a pic, sent it to my computer, cropped it, and did the rest of the drawing, refinement, and styling in StitchArtist Level 3. I altered the skulls’ features to match each character, creating the eye styles, and finishing up by making versions for patches using our faux-overlock edge tool and making custom fills and satin border elements for the direct-embroidery designs.”

This little library contains 4 ‘Skullies’ in 2 formats. Once you click the ‘Merge Design” button, you’ll find the library under Embrilliance: Halloween. In the ‘Skully Patch & Design’ section, each Skully is available in both a larger patch version and a smaller version made specifically for direct embroidery on fabric. The patch designs are interactive, allowing you to make patches with fabric either pre-cut or cut in the hoop and with or without a light cover fill to add texture to the fabric. For those of you who want a convenient run, they are set up from the start as thread-only patches that require no cutting to create!

Our own Lisa Shaw stitched out these fun little skulls, showing how our native BE designs can be scaled up or down and exploring even more creative options by making a glow-in-the dark version of our Dizzy Skully patch. She used the design as-is with Isacord/Mettler glow-in-the-dark thread and a SCHMETZ 75/11 embroidery needle. She also made a sparkling ‘mylar and light fill’ version of the Frustrated Skully using StitchArtist to implement her favorite mylar fill settings. She set her stitch length 3.3mm and lightened the density on the fill to 14pts. Whether you do a simple thread/color swap or jump into Create mode to craft your own elements and settings, the possibilities for customizing these simple skulls are endless!
We have created a PDF file that you can download with installation instructions – In short, they are installed like any other BX file! See how to install a BX here: How to Install a BX Video link
You may be familiar with BX files from the wealth of fonts available from top digitizers; the difference with BX libraries is that instead of showing up in the font pane you see when using the Lettering tool, Library designs are accessed via the Merge Library Design button on your button bar. This opens the library- to find the designs, select the Embrilliance: Halloween Catalog from the pull down menu in the upper left.

Select the patch you would like to use and click OK. The patch will show up in the center of your hoop.
Select the design in the Object pane. NOTICE the Interactive Tab in the properties pane. This is where you can have some fun and change the style of patch you would like to create! Check out the section on Patch Creation in the PatchArtist Instructional PDF for information on the settings. This PDF file also contains stitching guidance as well as some background information on patch making.

If you have StitchArtist Level 3, you can right click on the design in the Display pane and choose Convert to Objects. This gives you access to the native objects from the working file, meaning you can see how the design was digitized! You have complete access to all objects, their properties, their stitching order, etc.
If you aren’t already an Embrilliance owner, we provide a free method to use our software called Express Mode that will not only allow you to use any of the wonderful free designs found in our project blog, but also enables you to install and create basic text treatments with fonts distributed in our popular .BX format produced by many embroidery design creators.
To learn more about Embrilliance Express and for the instructions and links you need to download, install, and use our software with our free project files, please click here.
Thanks for you do for the embroidery community !!
Thank you for all you give to us