


It’s a good idea to introduce yourself! Whether you are going to a trade show, embroidery class, American Sewing Guild meeting, or even your local book club or Bunco group, name badges relieve the pressure of folks asking for and remembering names. Why not make your name extra memorable with an attractive embroidered badge? The following project includes 3 simple options that you can customize with your name using Embrilliance Platform programs, including Embrilliance Express! Read on for more information and for your free embroidery files in the project download!
Step-by-Step: In-the-Hoop with a Finished Back
Let’s start with a full, step-by-step breakdown of the most involved version of this project, the in-the-hoop name badge that features a fabric-covered, finished back.
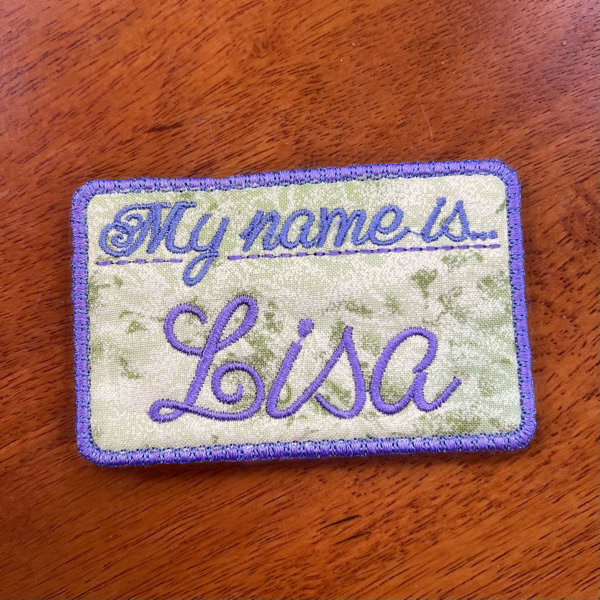
After downloading the project file linked at the bottom of this post, you’ll see 2 .BE native Embrilliance working files. For the first option, we’ll be opening the ‘Namebadge.be’ file. When you open this file, you’ll see a window as below with the name in Block font. If you only have Express and haven’t installed any other fonts, this will be the option you have for setting up your own name. If, however, you have other BX fonts installed and/or other Embrilliance Platform programs or packages with fonts, you’ll be able to use any font to replace and alter the name. Lisa chose to use PA Maggie, from our PatchArtist product.

Parts of the Design: The Stitch File by Color
In order to understand the way this project is stitched, let’s look at the structure of the final stitch file. This is what the file will look like after you’ve changed your name and saved the design in the stitch file used by your machine.

After customizing and saving Namebadge.be, the stitch file’s object tree will look like this. Color 1 is the placement stitch line showing where to place your fabric. Color 2 is the tackdown stitch line that sews down the material and provides a line against which to cut away excess. Color #3 includes the “My Name is…” text and decorative underline. Color #4 includes your name lettering. Color 5 attaches the backing fabric to the underside of the hoop. Color 6 is the satin border, and Color 7 adds the decorative stitching over the satin border.
Stitching Steps

Step 1:
Hoop your stabilizer and stitch Color 1.
Cut a piece of fabric a bit larger than the stitched line. Lisa wanted her badge to have a bit of body, so she included a thin layer of batting cut slightly smaller than the placement line, placed under the top fabric.

Step 2:
After placing the fabric so that it completely covers the placement line, stitch Color 2 to secure the fabric and batting to the stabilizer.
Carefully trim away excess fabric close to the stitching. The tack down stitching is inset enough that the satin border will completely cover the edge if you can see the original placement stitch line after you trim.

Step 3:
Return the hoop to the machine and stitch the Colors 3 and 4, the “My name is….” text with its decorative Sashiko stitch dividing line followed by your name.

Step 4:
Remove the hoop from the machine to allow you to place the finshing backing fabric. In this step, you may elect to add ‘badge magnets’ to allow you to wear your badge easily without pinning it to your clothing. The two-piece badge magnet set seen here is a common option.

Placing the Bar
For this option, you’ll place the bar in the middle of your badge, between the stabilizer and the final backing fabric, leaving plenty of room for the satin stitch border. The bar will have a self-adhesive strip. Peel the backing paper away and stick it in place within the badge area.

Adhering the Back
Finally, we’ll need to use some adhesive to lightly attach the backing material to the rear of the badge. A small, light bead of fabric adhesive with a little firm pressure should be enough to hold the piece in place. In a pinch, you can do as Lisa did with this piece and use a very light amount of standard ‘school’ glue to hold the layer in place.

Step 5
Return the hoop to the machine and stitch the Color 5 – this attaches the backing fabric. Remove hoop and carefully trim away any excess as shown in Step 2 as needed. Return the hoop to the machine for the final time, stitching colors 5 and 6 to add your satin stitch and decorative motif to finish the edge.
Step 6
Remove excess stabilizer and clean up your edges. Just like working with patches, this process can change depending on the stabilizer you choose to use. For wash-away stabilizers, this means rinsing, for thermoplastic badge-films this means tearing away and heating the edge. For Lisa’s example, she used a standard nylon mesh stabilizer that she trimmed close to the badge, applying heat to reduce the remaining fuzz.
Bonus – the Quick and Easy Badge
For this badge, hoop a full span of your badge fabric and run the same design, skipping Colors 1, 2, and 5. This will stitch all of the text, borders, and decorative elements without stopping for cuts or the finished back. Once finished, cut away excess material carefully. If you use felt, any scissor will do, but for material that frays, using a pinking shear will help avoid unraveling too quickly at the edges.
Preparing your Stitch File: Important Notes

NOTE: if you have Essentials, you will want to TURN OFF the Remove Hidden Stitches function in your program preferences. Otherwise, the second Applique stitch (the one that attaches the fabric to the BACK of the hoop) will remove all of the stitching on the inside. The software does not know that you plan to put the fabric under instead of the “normal” on top of the hoop. Go to the ‘Edit’ menu, and click the ‘Preferences’ option. You’ll see the panel above. In the ‘Jumps/ Overlaps’ tab, uncheck the ‘Remove overlaps when saving stitch files’ option as shown above to turn off the automated hidden stitch removal.
Option 2: The Thread-Only Badge
The second file included in this zipped file was created with PatchArtist and is made completely of thread. Essentially, it’s a thread-only patch, These types of badges can be stitched on fabric-style water-soluble stabilizers if you like the ‘rinse-away’ option, or on thermoplastic badge films if you like the ‘tear-out’ option in which a little heat clears up the edges. That said, Lisa stitched her version on a standard nylon mesh stabilizer, trimmed away the excess close to the badge, and used a lighter flame to melt the any remaining wisps of stabilizer. It’s easier than you think to get a clean edge! For more information on patch-making, the latter half of the supplemental PDF guide to PatchArtisthas some great starter information.
This design is provided in our native .BE format, enabling you to save a stitch file for any embroidery machine. If you aren’t already an Embrilliance owner, we provide a free method to use our software called Express Mode that will not only allow you to use any of the wonderful free designs found in our project blog, but also enables you to install and create basic text treatments with fonts distributed in our popular .BX format produced by many embroidery design creators.
To learn more about Embrilliance Express and for the instructions and links you need to download, install, and use our software with our free project files, please see our Express Mode instructional guide.