

Our Erich Campbell decided to revitalize one of his earlier fine-line woodcut-styled designs by creating a version in StitchArtist Level 1 for our Embrilliance family to have a quick-stitching holiday and religious decoration. Though the original was created for a friend, he also took the time to execute the design in a way that offers us a chance for some embroidery education. Read on and learn more about run-stitch details and digitizing or download the file immediately below.
The Design
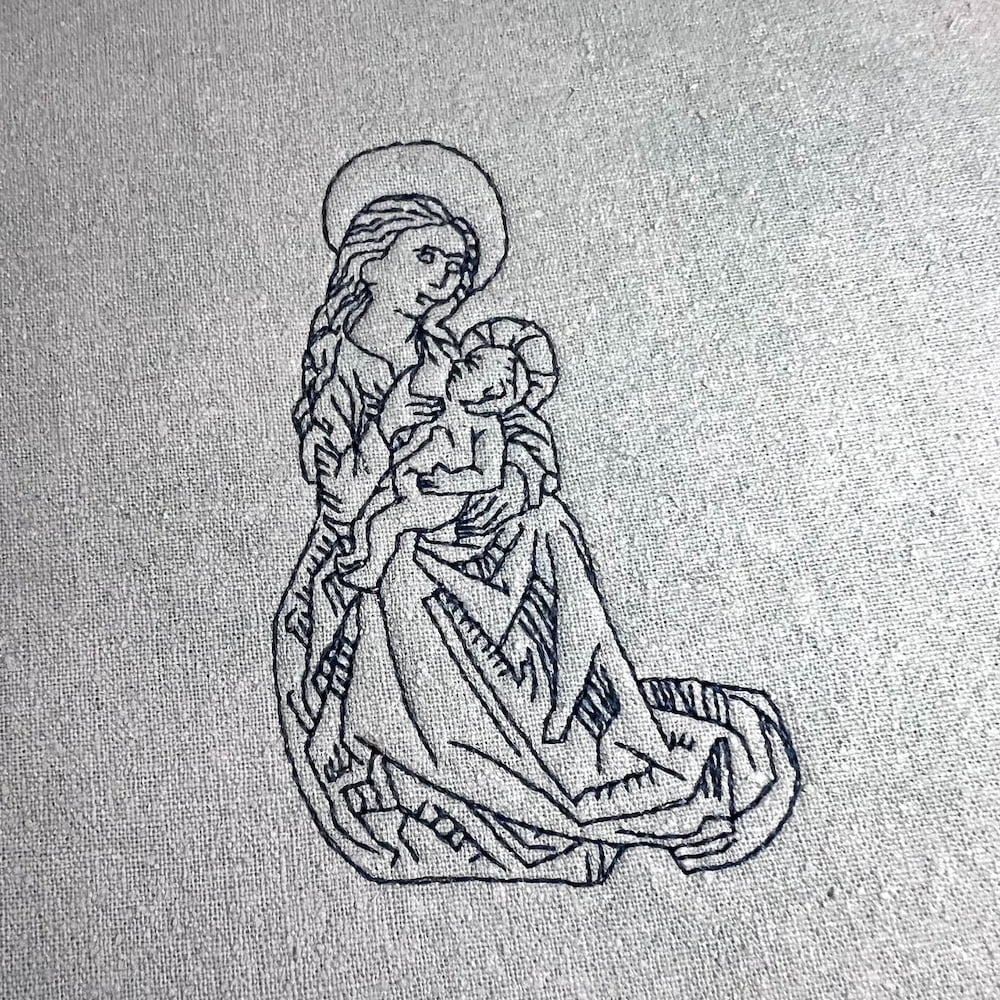
Erich was inspired by this 15th century religious illustration that evokes a similar style to many of his woodcut single-color pieces. This particular piece, however, had an interesting mix of bold, angular lines and an illustration style that hearkened back to medieval art. He knew it would make an excellent study in a single color run-stitch design.

The Digitizing
Erich wanted an even thickness of line throughout the piece. In order to make sure the lines are precisely even in thickness, Erich drew over each line, passing over each line that he retained in the embroidery exactly twice. Through not always visible on screen, we know that each time we stitch over a line, that line becomes thicker. Stitches don’t stand on each other in a stack, even if the lines that you draw are precisely atop a previous line. As stitches roll off and stack beside each other when they run, each pass of straight stitches over the line makes that line thicker and thicker.
Taking Tours
In order to keep his perfect count, Erich started at a position on the left side of the design, at the elbow of the Madonna, and drew his line, starting a ‘tour’ further into the piece wherever he hit an intersection. Illustrated on the simplified leaf shape below, you can see the concept of these tours illustrated.

Starting from the bottom of the stem and heading up in this case, you can see that every time Erich hits a ‘fork’ in the stitch path, he starts down the newly encountered line (red arrow) until he hits a natural end to that path and starts to head back (blue arrow) toward the fork where he came from. This continues, ‘touring’ in and out of these pathways until he returns to his start point. You can see where he travels around the leaf’s edge, encounters a small detail line at the upper right, tours in to the line, and back out, then continues along the edge. Eventually doubling around the leaf and heading back down the stem to the origin point.
Studying the Stitch Simulator
One of the best ways to understand this ‘touring’ process is by watching designs like this one run, both virtually and at the machine. Start by using the Stitch Simulator and either replaying or scrubbing through the design as it runs in sequence. You’ll be able to see the various ‘tours’ and travels as the design is formed.

Using the Angles
You’ll also notice the other educational thing Erich decided to do in creating this design. As an embroiderer who stresses learning the nature of the stitch, Erich always reminds his students to remember how stitches look and operate when they create a design. Any single stitch can only ever be a straight line from one needle penetration to the next. Erich wanted to emphasize this understanding of straight lines and stitches, so he digitized this design with only straight lines and line nodes. There are no curved lines in the digitized piece.

Though this design is very angular, you may see that some of the lines look very curved, especially in the final embroidery. First, any curved line you draw will always be made of several straight segments in embroidery, as it will always be made of stitches. That said, there are ways to accentuate the roundness of your curves, particularly in small, tight curves that can otherwise look very angular when you digitize the curves and allow the software to determine exactly where your stitches will land.
Offsetting Stitches
You may have noticed already on the replay that the entire design is one object, and that Erich manually draws every line twice, not copying and pasting sections or using the ‘Double’ stitch type to automatically cover a line twice. Erich does this for two reasons: First, so that he can introduce a little bit of unevenness and roughness in the lines to more closely echo the rougher lines of the original art, and second, so that he can manually offset the penetration points around tight curves to make them look more rounded.
In the example below, you can see that when you either copy and paste a curved line or use a ‘Double’ run stitch type, tight curves can look very angular as the needle penetration points land exactly in the same place on both passes over the tightly curved line. In the example on the right, you can see that when the penetration points on the stitches are offset from each other manually, your tiny curved lines look a little more round and full than the angular rendition on the left.

Though this is most evident in very small details and curves, you can see this principle being used in several areas of the Madonna and Child design. Look specifically at the halos for an example of these offsets done with a little more ‘swing’ to make the lines look rougher and more organic as well as more rounded. Watch this design stitching on your machine and the effect is even more evident.

The design is provided in our native .BE format, enabling you to save a stitch file for any embroidery machine. If you aren’t already an Embrilliance owner, we provide a free method to use our software called Express Mode. It will not only allow you to use any of the wonderful free designs found in our project blog, but also lets you install and create basic text treatments with fonts distributed in our popular .BX format produced by many embroidery design creators.