
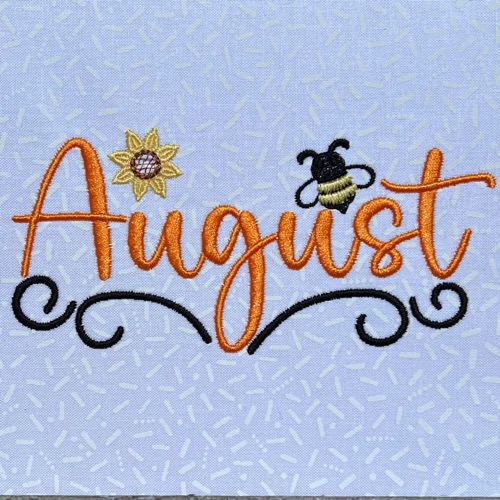
Our own Lisa Shaw continued her Monthly Free Design Series with a harvest-themed ‘August’ embroidery design ready for you to download! If you have a garden, you know that bees and sunflowers are abundant this month and the art from Sanqunetti Designs showcased them beautifully. This design compliments any seasonal decoration, with colors that rival the fresh flowers and veggies straight from your garden! It’s an excellent embellishment for aprons, kitchen towels, garden flags, or even gift basket liners! Be sure to check out the the post on February’s design to see how you can capture the sunflower and bumblebee “mini-designs” in this piece to use your other creations!

Carving Lines in StitchArtist Level 3
Lisa’s design makes effective use of the carving line function in StitchArtist L3. Let’s learn more about it! The texture of the sunflower petals is created by adding a carving line to the satin object. This carving line directs the program to place needle drops where satin threads cross over the line, creating a planned embossed texture.

To create a carving line, select your intended object and click the Carving Line button shown above. Now, you’ll draw your line with points similarly to any other object you draw when digitizing. Once you’ve finished the line, pressing the enter key will finalize the line and your stitches will show the carved result. You can even draw or use a line you’ve already drawn as a carving line when in Create mode by selecting your intended stitched object together with the line you want to use for carving, right-clicking, and selecting the ‘Combine with Carve’ option. You may need to generate your object again to see the carving pattern. Note: you can add more than one carving line to a larger object to create more complicated carving patterns.

In the August design, the needle drops in the stitches form a “dimple” directly along the carving object. As you can see with this lovely sunflower mini-design element, carving lines are an excellent way to add texture to a stitched object with precise direction.

To learn more about some of the StitchArtist L3 tools, such as how to add a carving line to an object, please check out the StitchArtist L3 Controls video.
The design is provided in our native .BE format, enabling you to save a stitch file for any embroidery machine. If you aren’t already an Embrilliance owner, we provide a free method to use our software called Express Mode that will not only allow you to use any of the wonderful free designs found in our project blog, but also enables you to install and create basic text treatments with fonts distributed in our popular .BX format produced by many embroidery design creators.